It’s almost the weekend and we all know what that means. There’s so many sports games on and we can’t just watch them empty-handed! I don’t know about you, but I love watching football with my husband. And I love making game-day food. A Lion’s win would be good too.
Photography by Allyson Regan
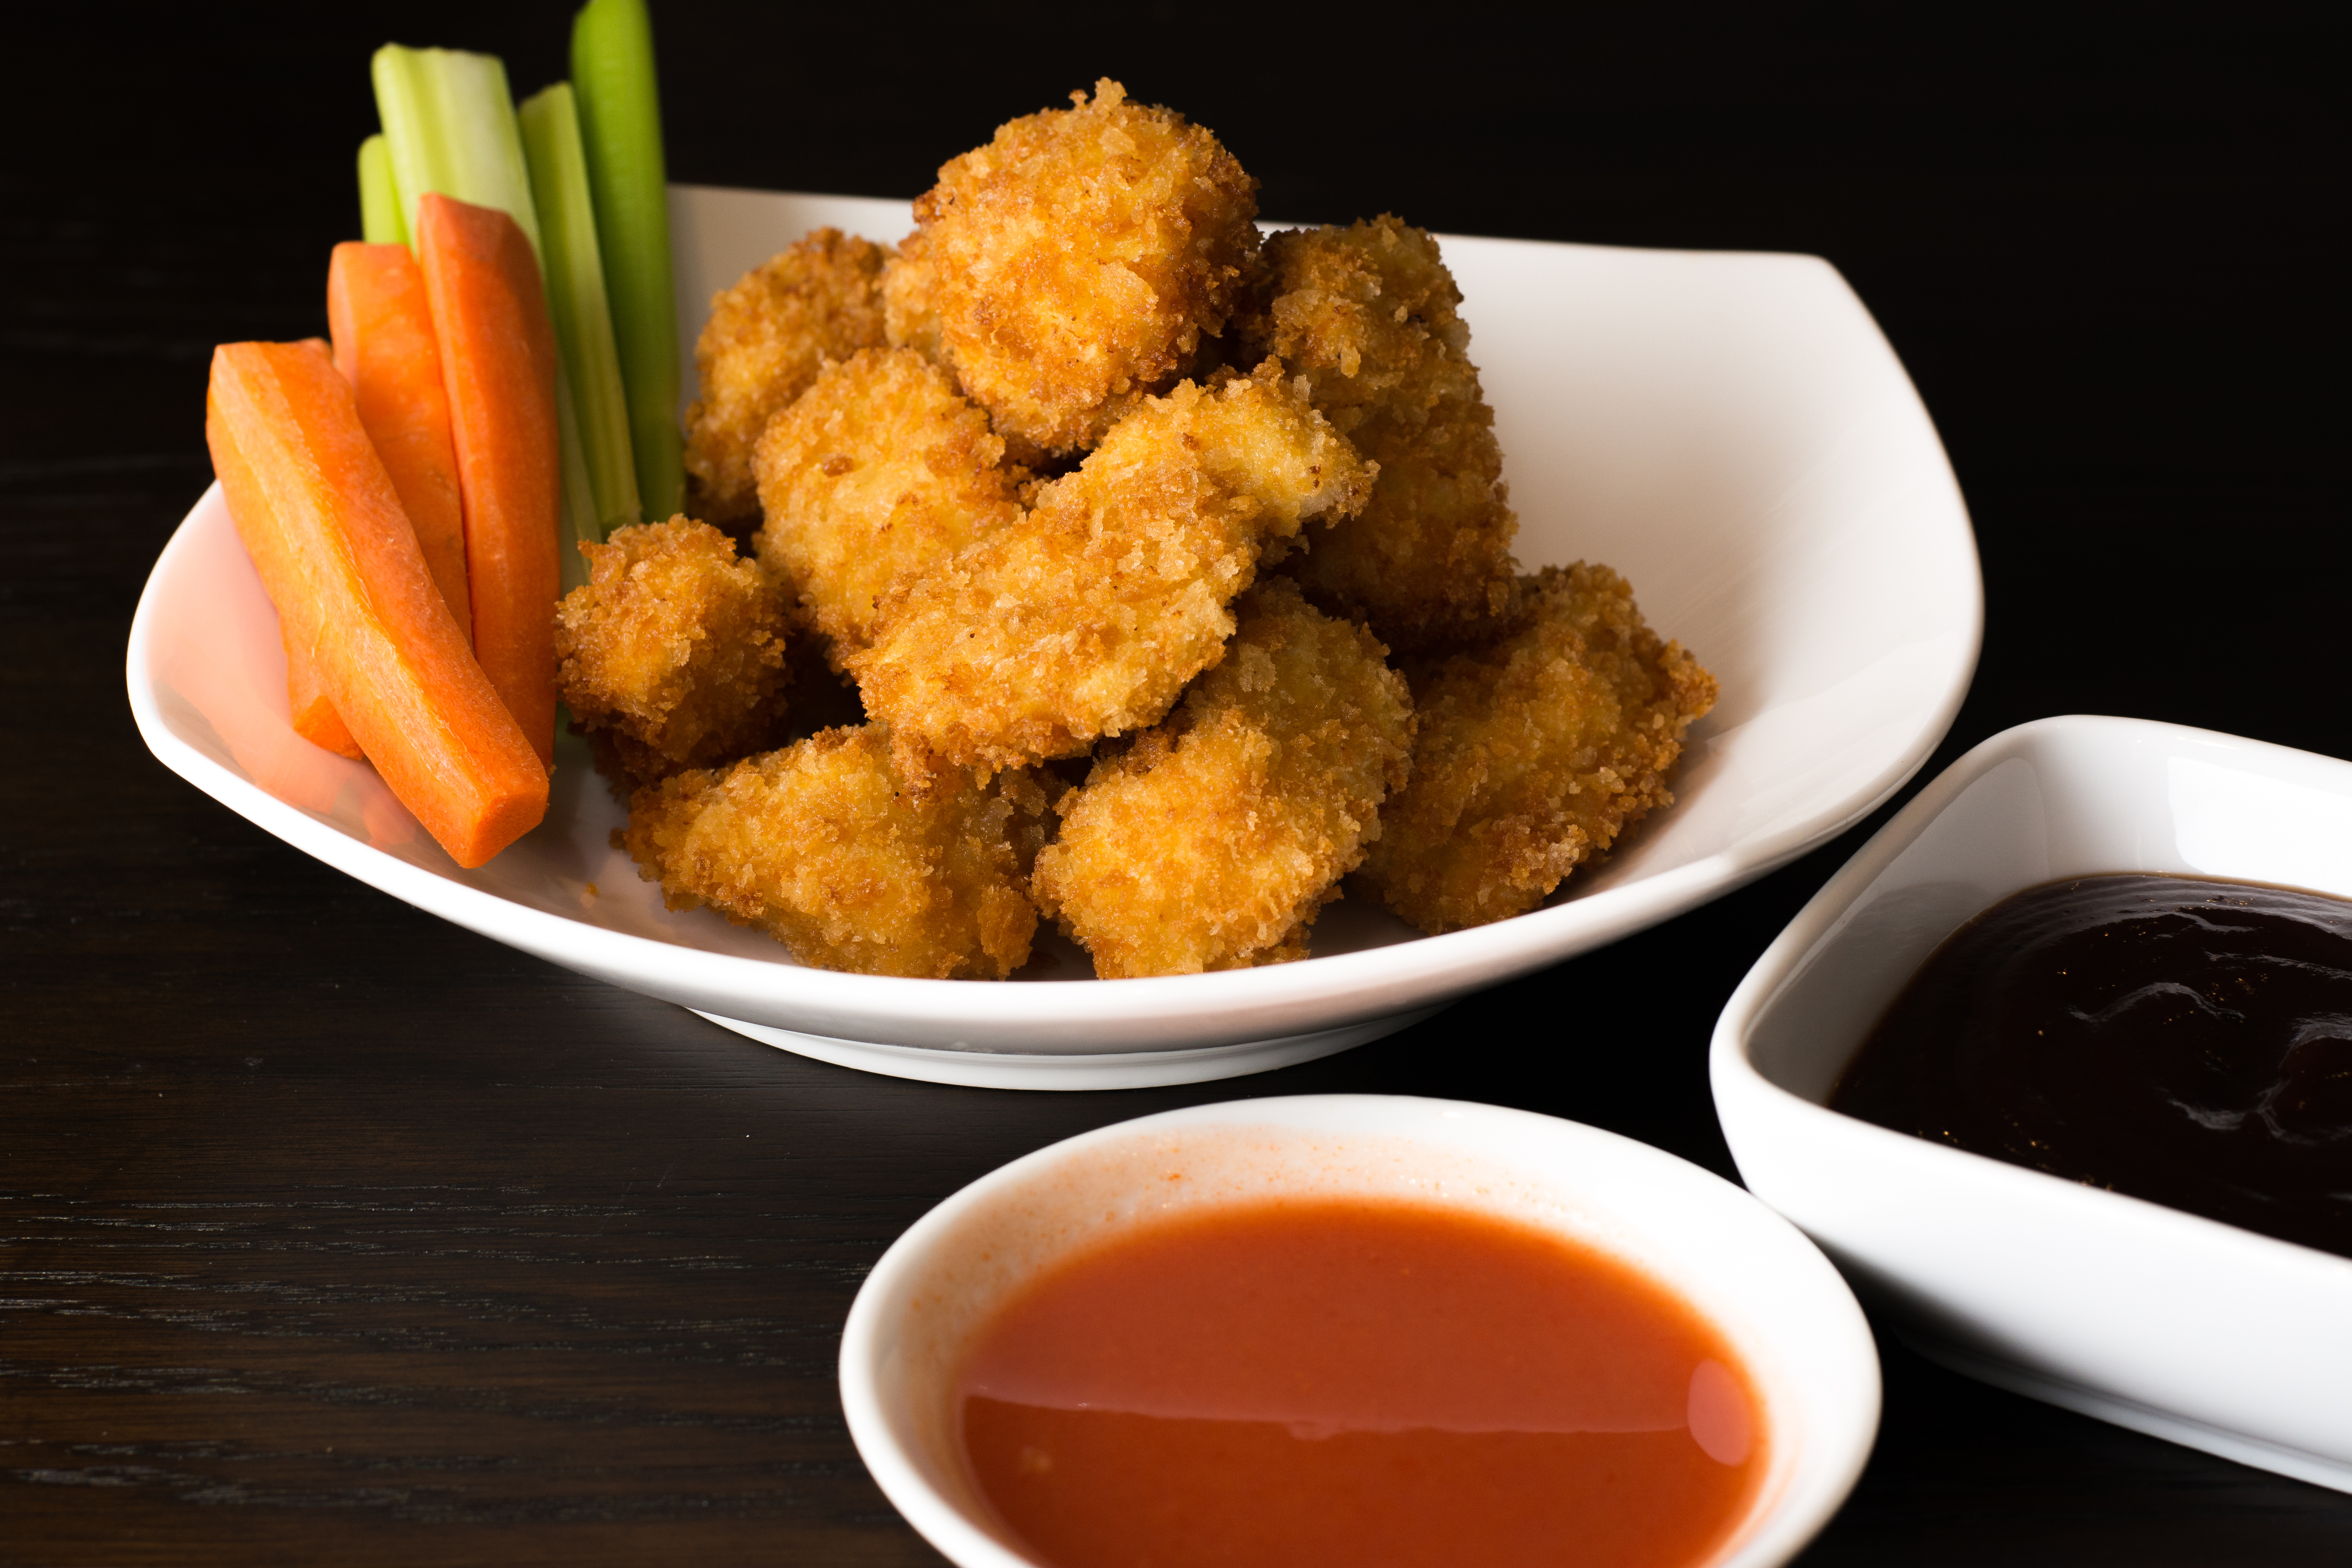
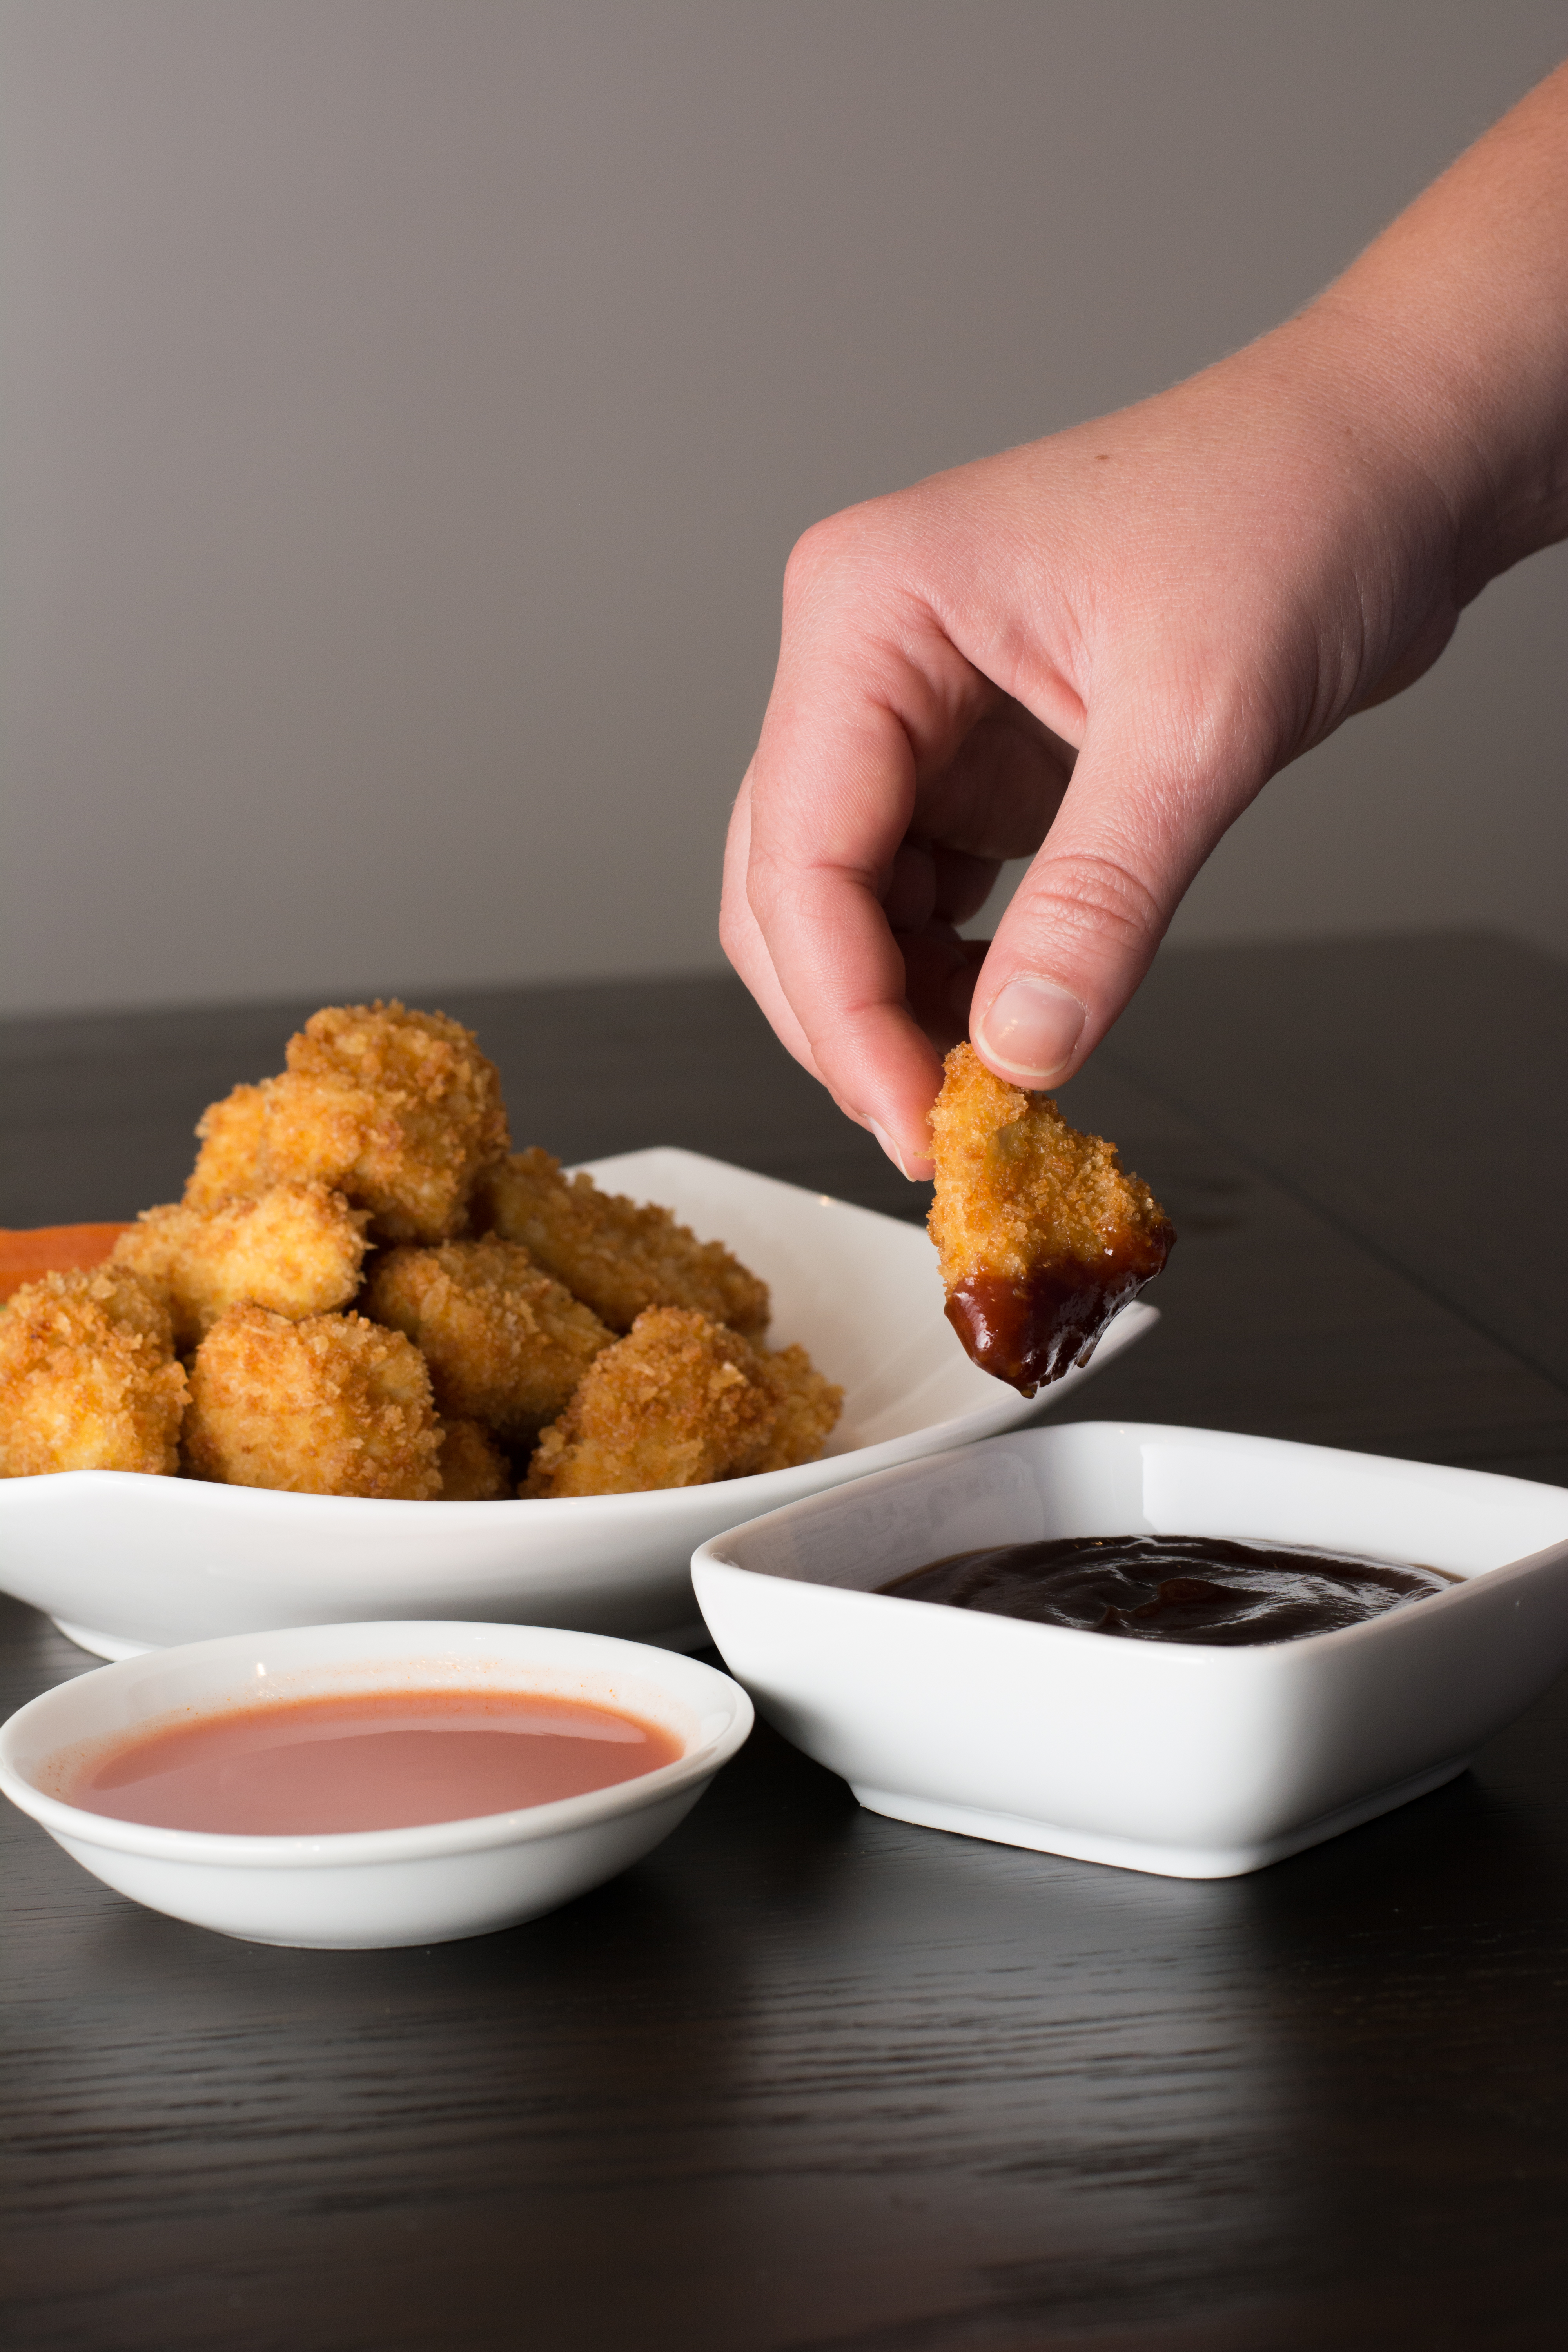
This recipe for boneless chicken wings is so incredibly easy, and it’s one of the most requested meals in our home. Seriously, if you are entertaining for the game this weekend, you have to try this recipe. What I love about this dish is that it uses boneless, skinless, chicken breasts, but you can easily switch it up and use chicken thighs, or just chunk up a whole chicken. Even though bags or frozen chicken wings can be delicious and easy, I like to be able to have chicken wings made from good, antibiotic-free, hormone-free, delicious chicken that I normally buy. Also, in those frozen convenience chicken products, they don’t use the best chicken.
Photography by Allyson Regan
Boneless Chicken Wings
1 2.5 pound package of boneless, skinless chicken breasts
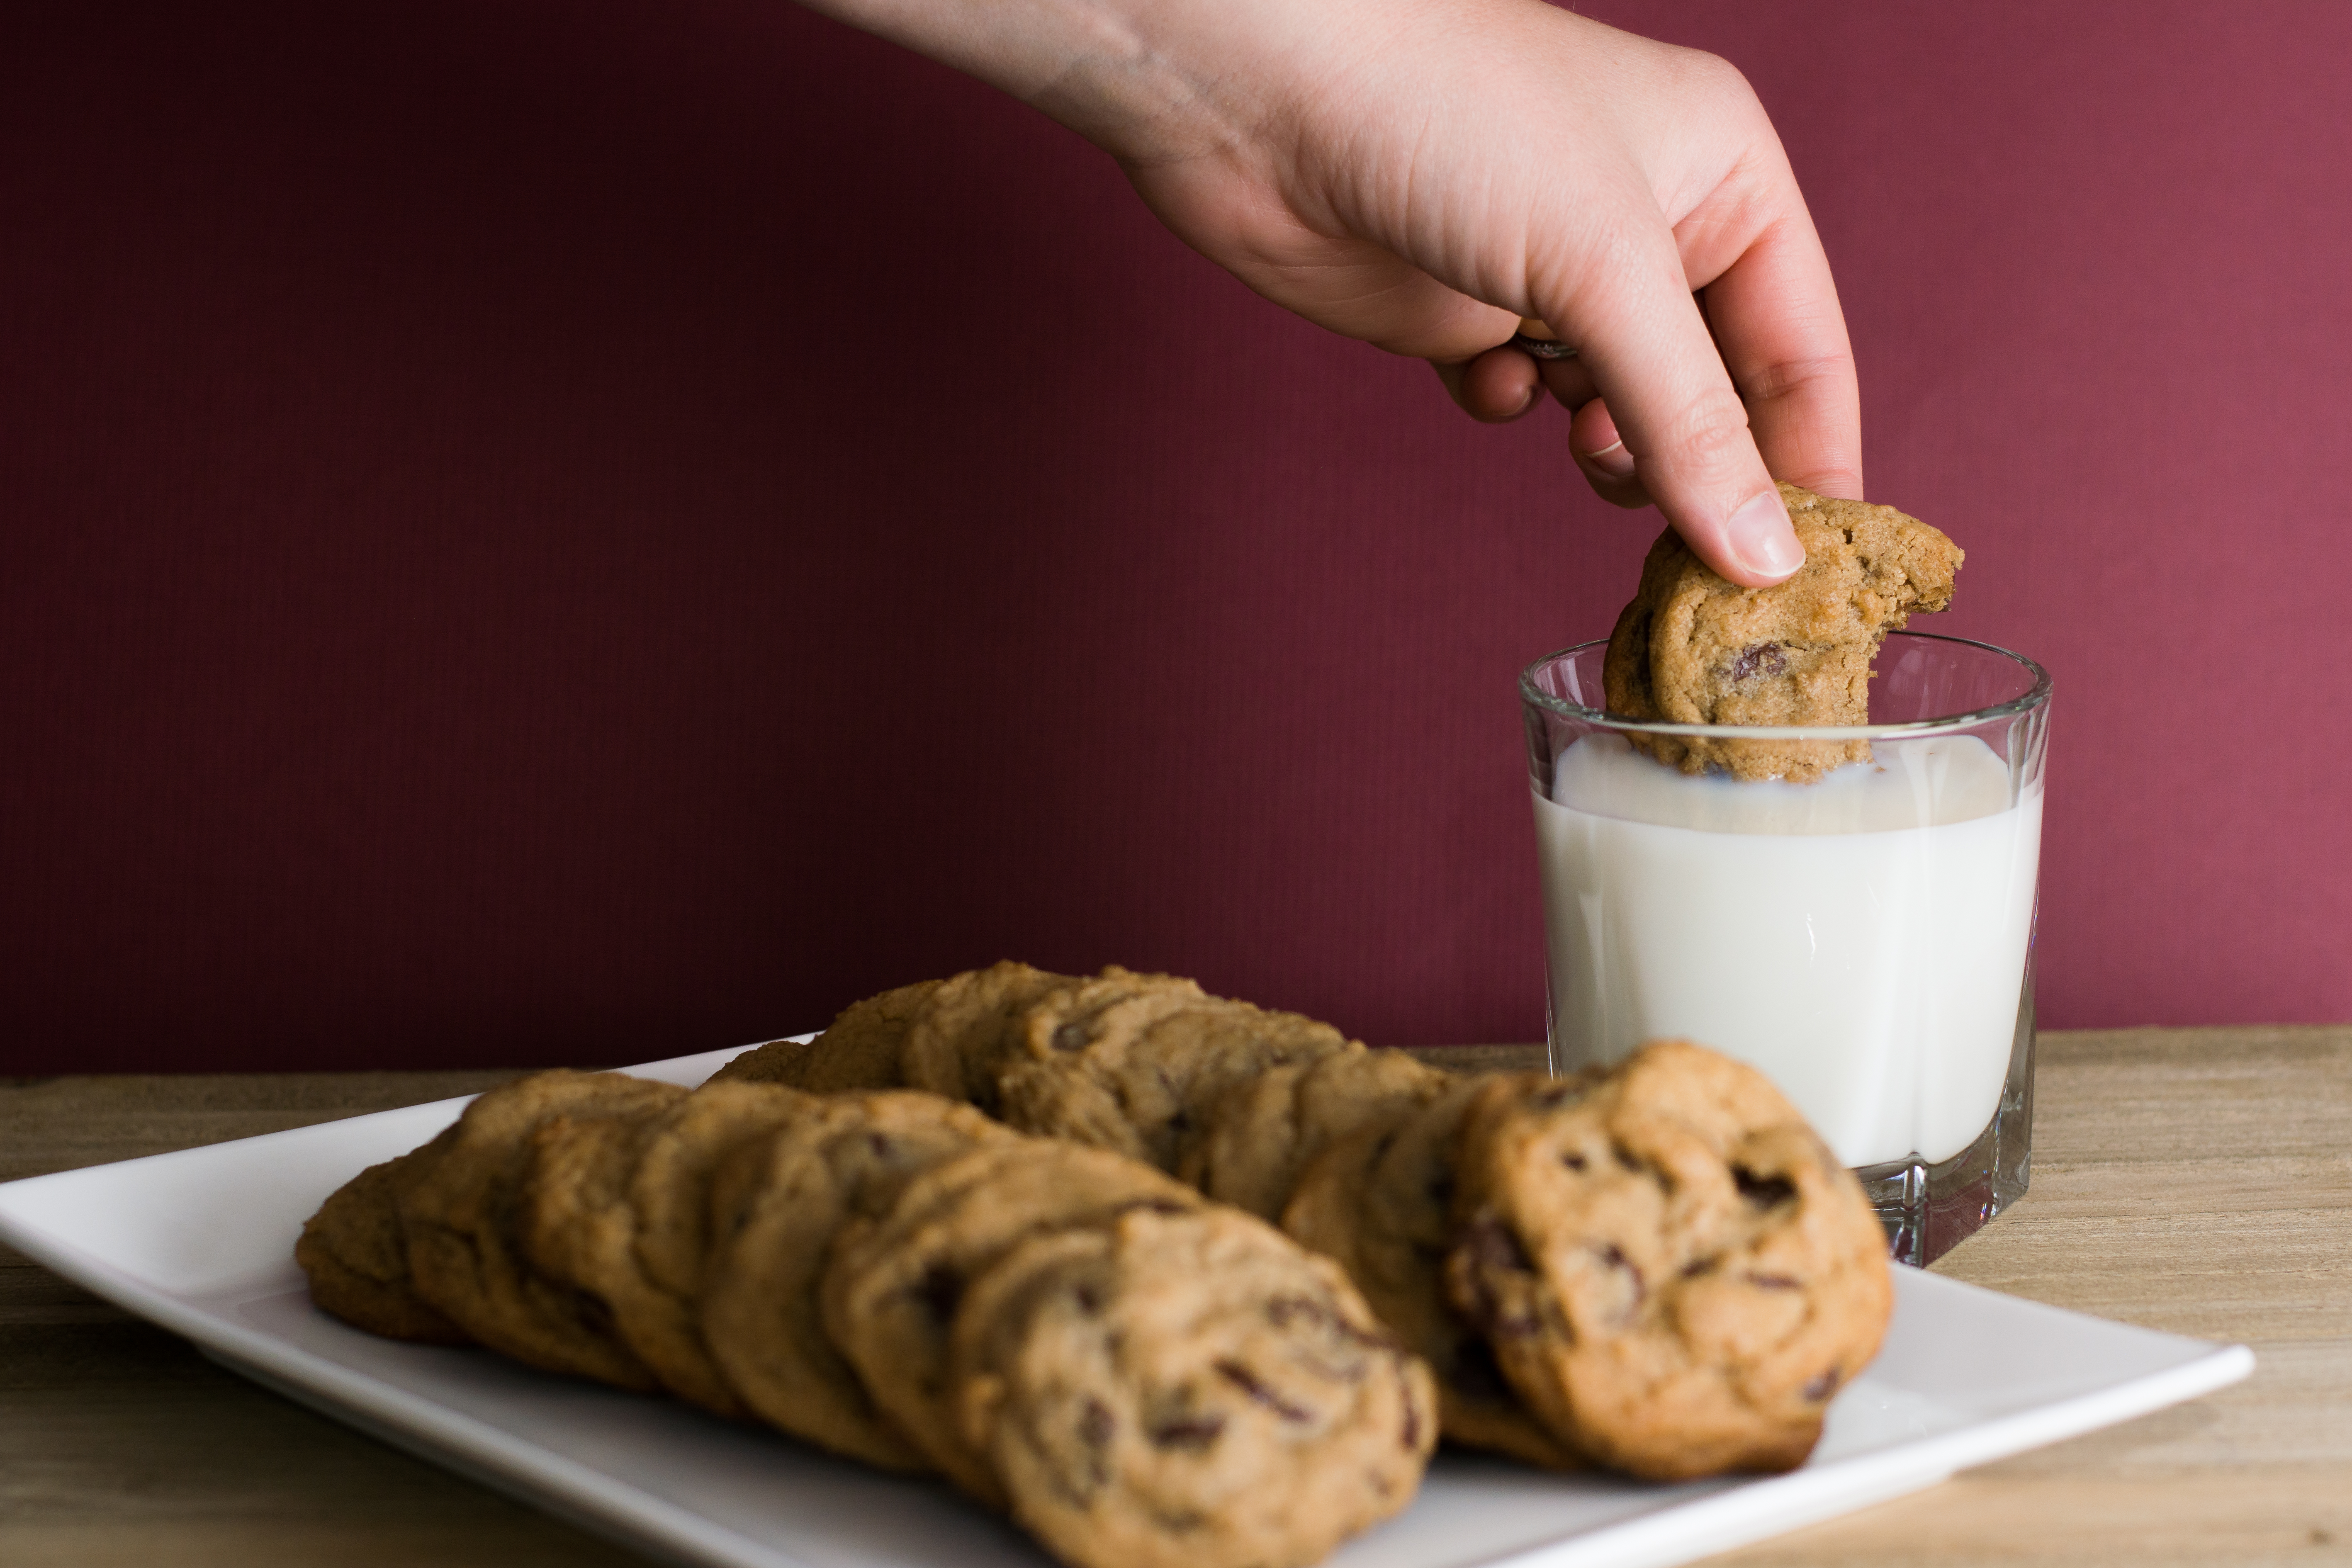
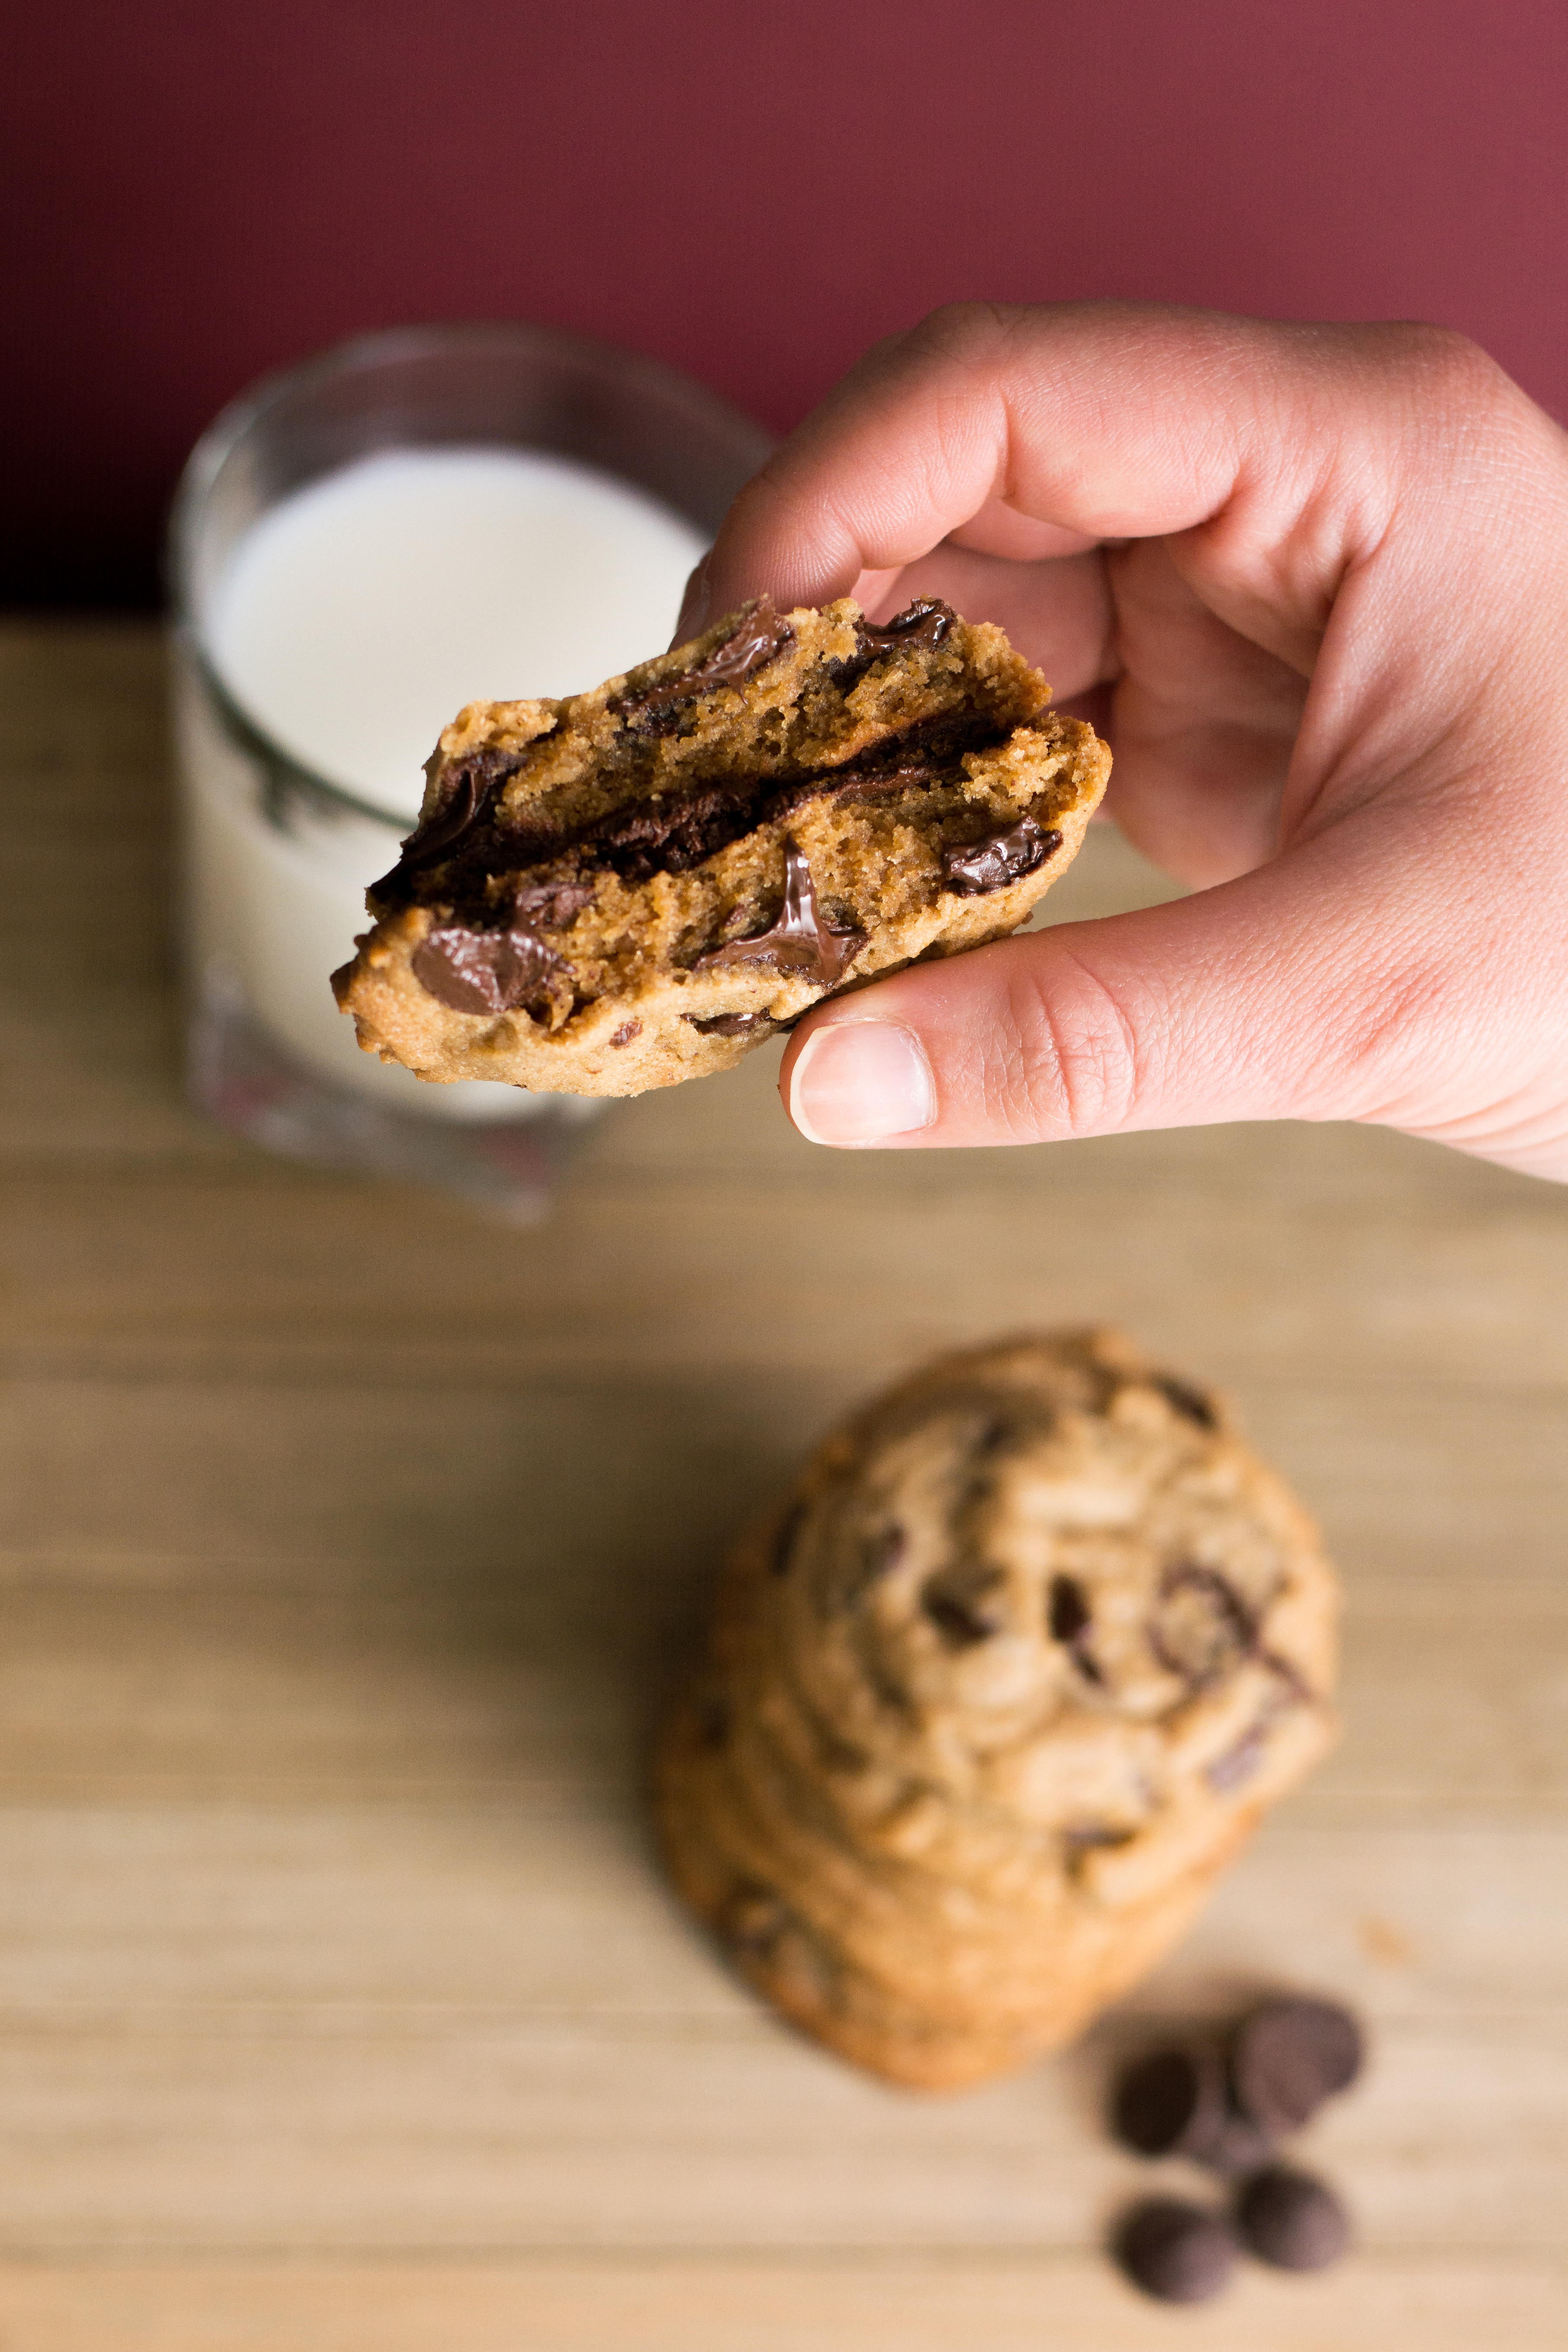
You guys. These cookies are amazing. But really. Seriously. For real. No joke. Okay I think you get it now. But I’ve been making these cookies for almost a year and I’ve made them so much that I’ve truly perfected the recipe. While they have peanut butter in them, they really just taste like a jacked up chocolate chip cookie. The peanut butter helps keep the texture soft and chewy. I simply adore these cookies because the edges are slightly crisp while the center is just baked and chewy, making them perfect for dunking in ice cold milk.
Photography by Allyson Regan
These are also a crowd favorite! This has been the most requested cookie from my husband recently. I made them over the summer for a camping trip and they made delicious smore’s! I would recommend storing them in tupperware instead of in a bag though, they tend to get crumbly easily in bags.
Photography by Allyson Regan
Just look at that crumb! I usually use Ghirardelli bittersweet dark chocolate chips, which are disk shaped and help to form these delightful chocolate layers. So good! I almost always have this recipe frozen into small balls so that when I have last minute company, or a bad day, I can whip these cookies up in 12 minutes or less!
Photography by Allyson Regan
Peanut Butter Chocolate Chip Cookies
1/2 cup butter, softened
1 cup light brown sugar
1 large egg
2 tsp vanilla extract
1/2 cup peanut butter, creamy
1 1/4 cup all purpose flour
1/2 tsp baking soda
1/2 tsp salt
2 cups chocolate chips
Preheat the oven to 375 degrees. Cream butter and sugar until just combined. Add in the egg and combine well. Add in the peanut butter and mix. Add in the rest of the dry ingredients mixing just until combined. These work best when the dough is chilled slightly before baking. Scoop into dough balls, I use a scoop that is about a 1/4 cup. Bake for 12 minutes, turning half way through to ensure even baking. Let cool for a minute or two on the tray and flatten slightly with the back of a spatula. Remove from the tray and cool on a wire rack. If the chocolate solidifies, reheat in the microwave for 30 seconds. This recipe works just as well when you bake them from frozen, you might just need to keep an eye on them and maybe add a couple extra minutes. I’ve tested this recipe twice doubling the batch and they still work out great!
Photography by Allyson Regan
Be right back, I’m going to find a giant mug of milk and dunk this whole stack in it. Don’t judge me until you try this recipe. And if you try this recipe, share your pictures on social media and tag me!
September felt like it flew by! The weather was so unpredictable that it truly didn’t feel like summer was over until last week. At least not in Michigan! So let’s take a minute to look back on the awesome things we featured on the blog.
Photography by Allyson Regan
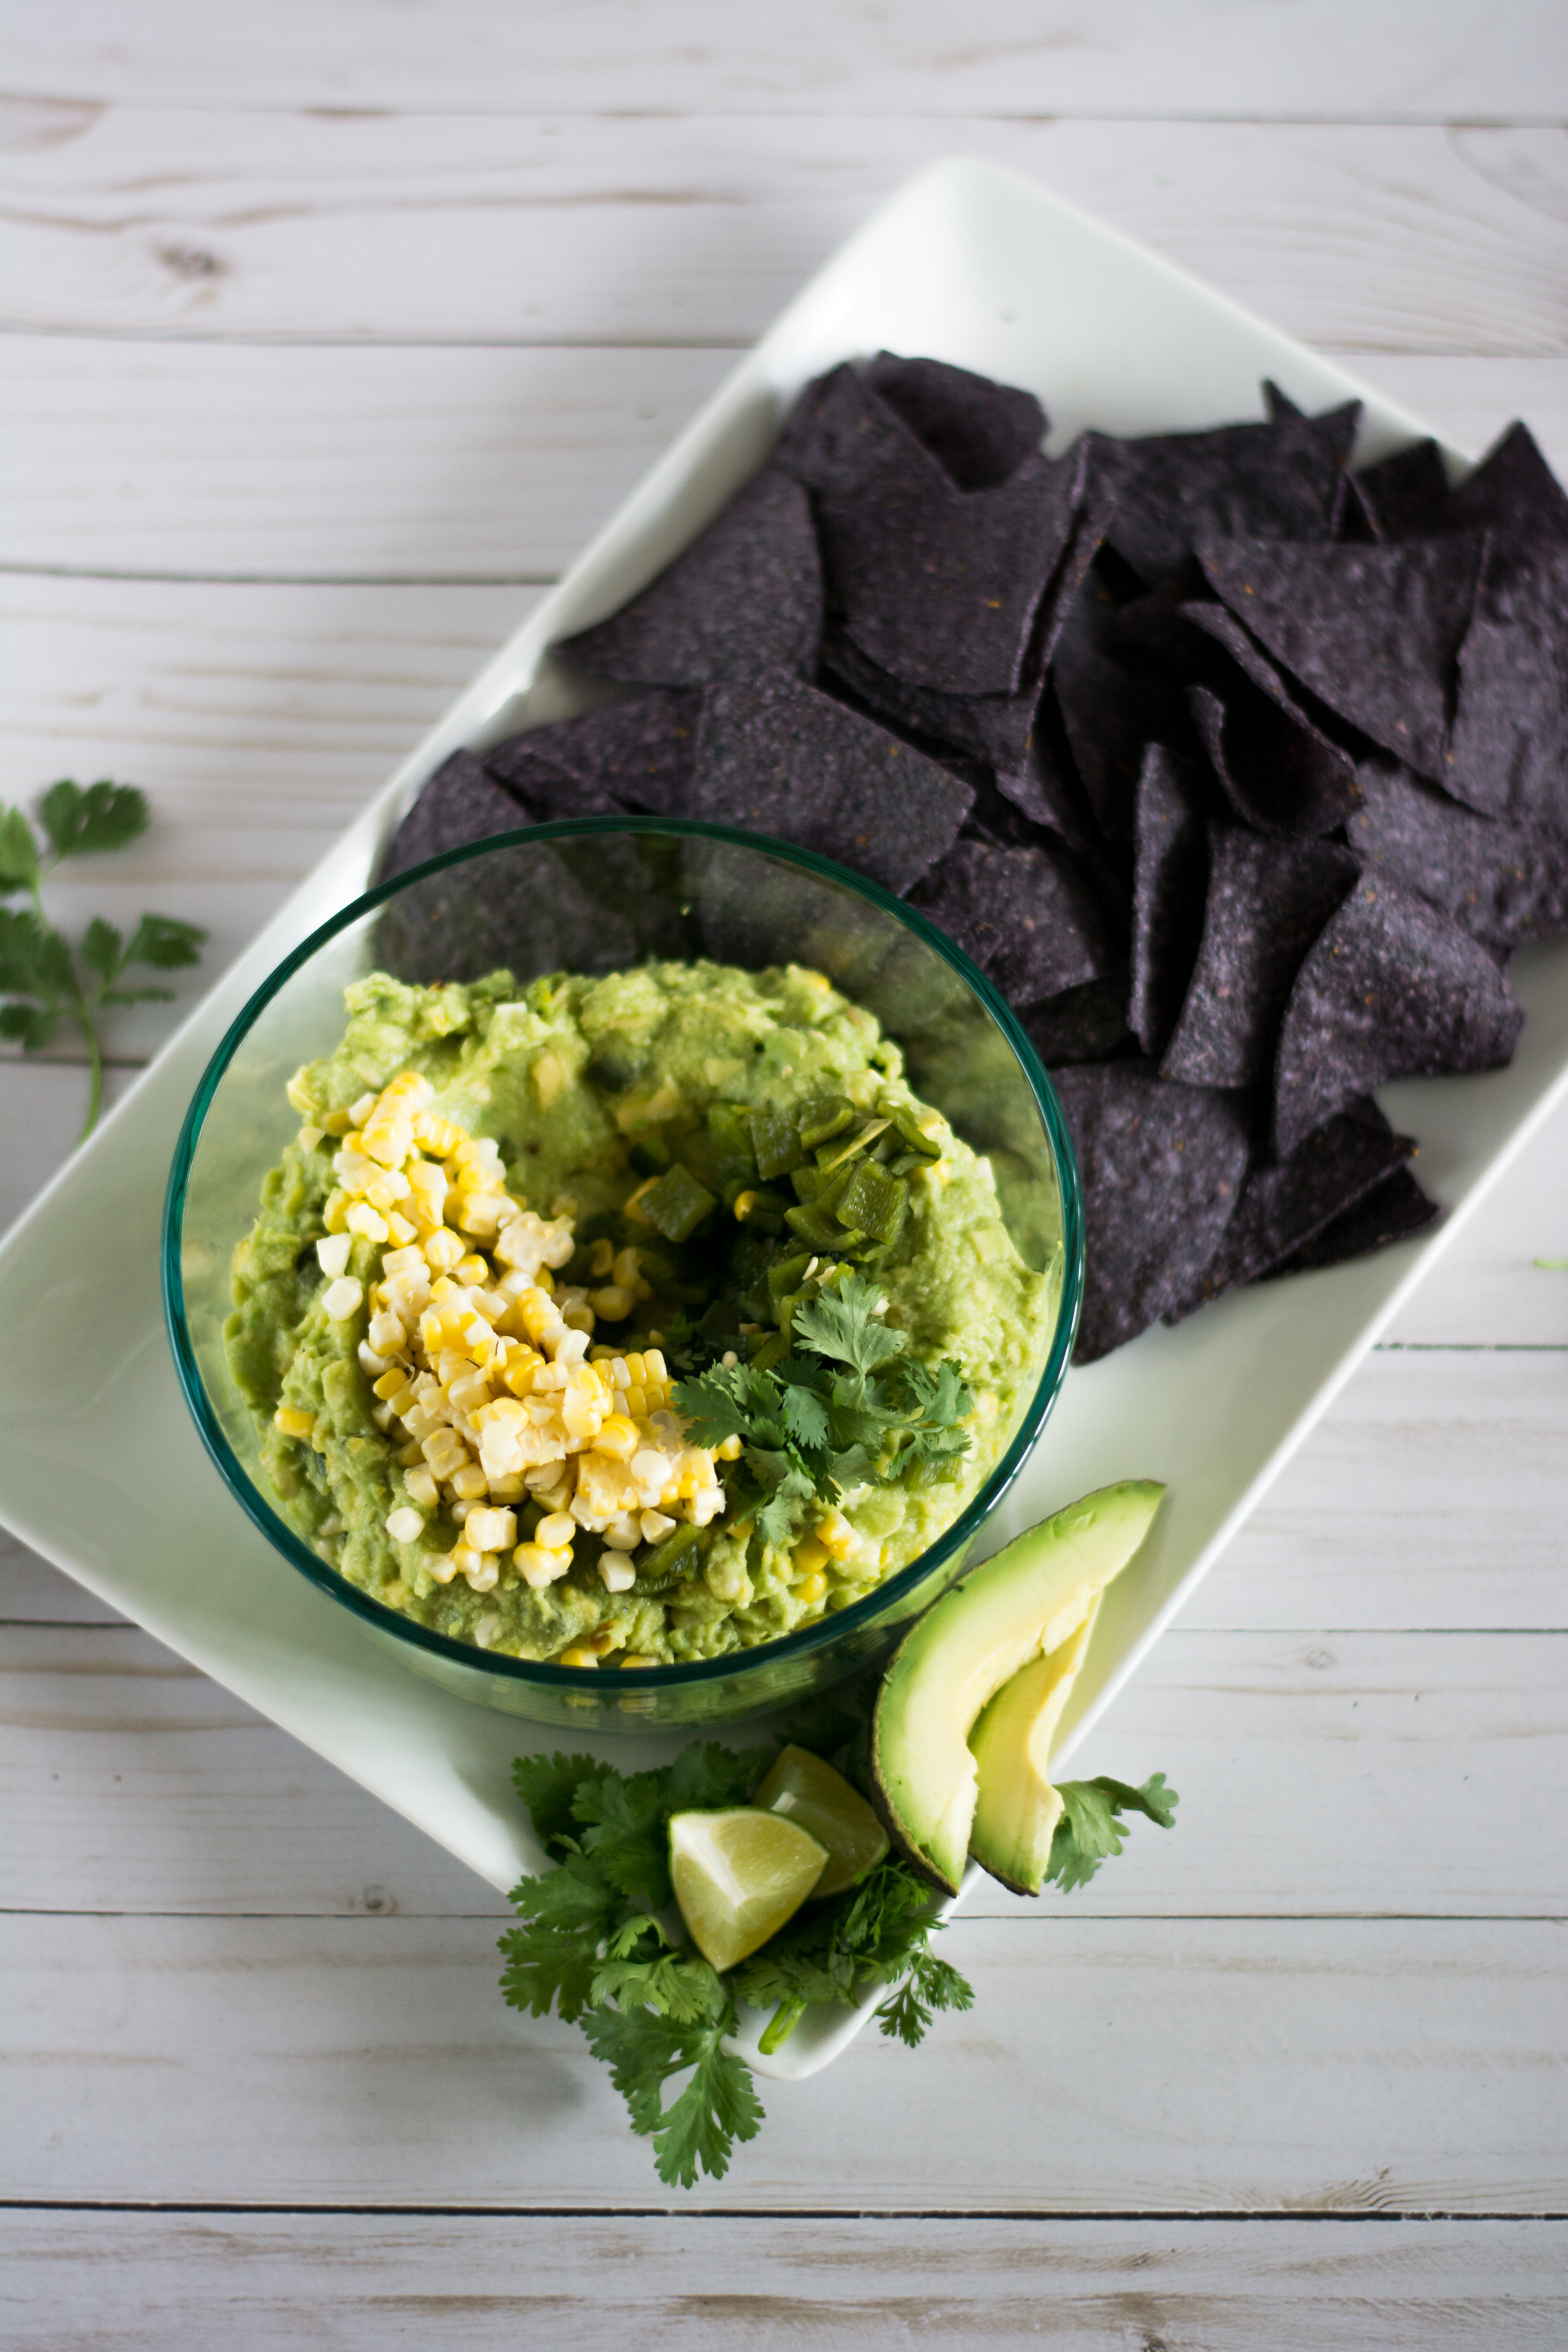
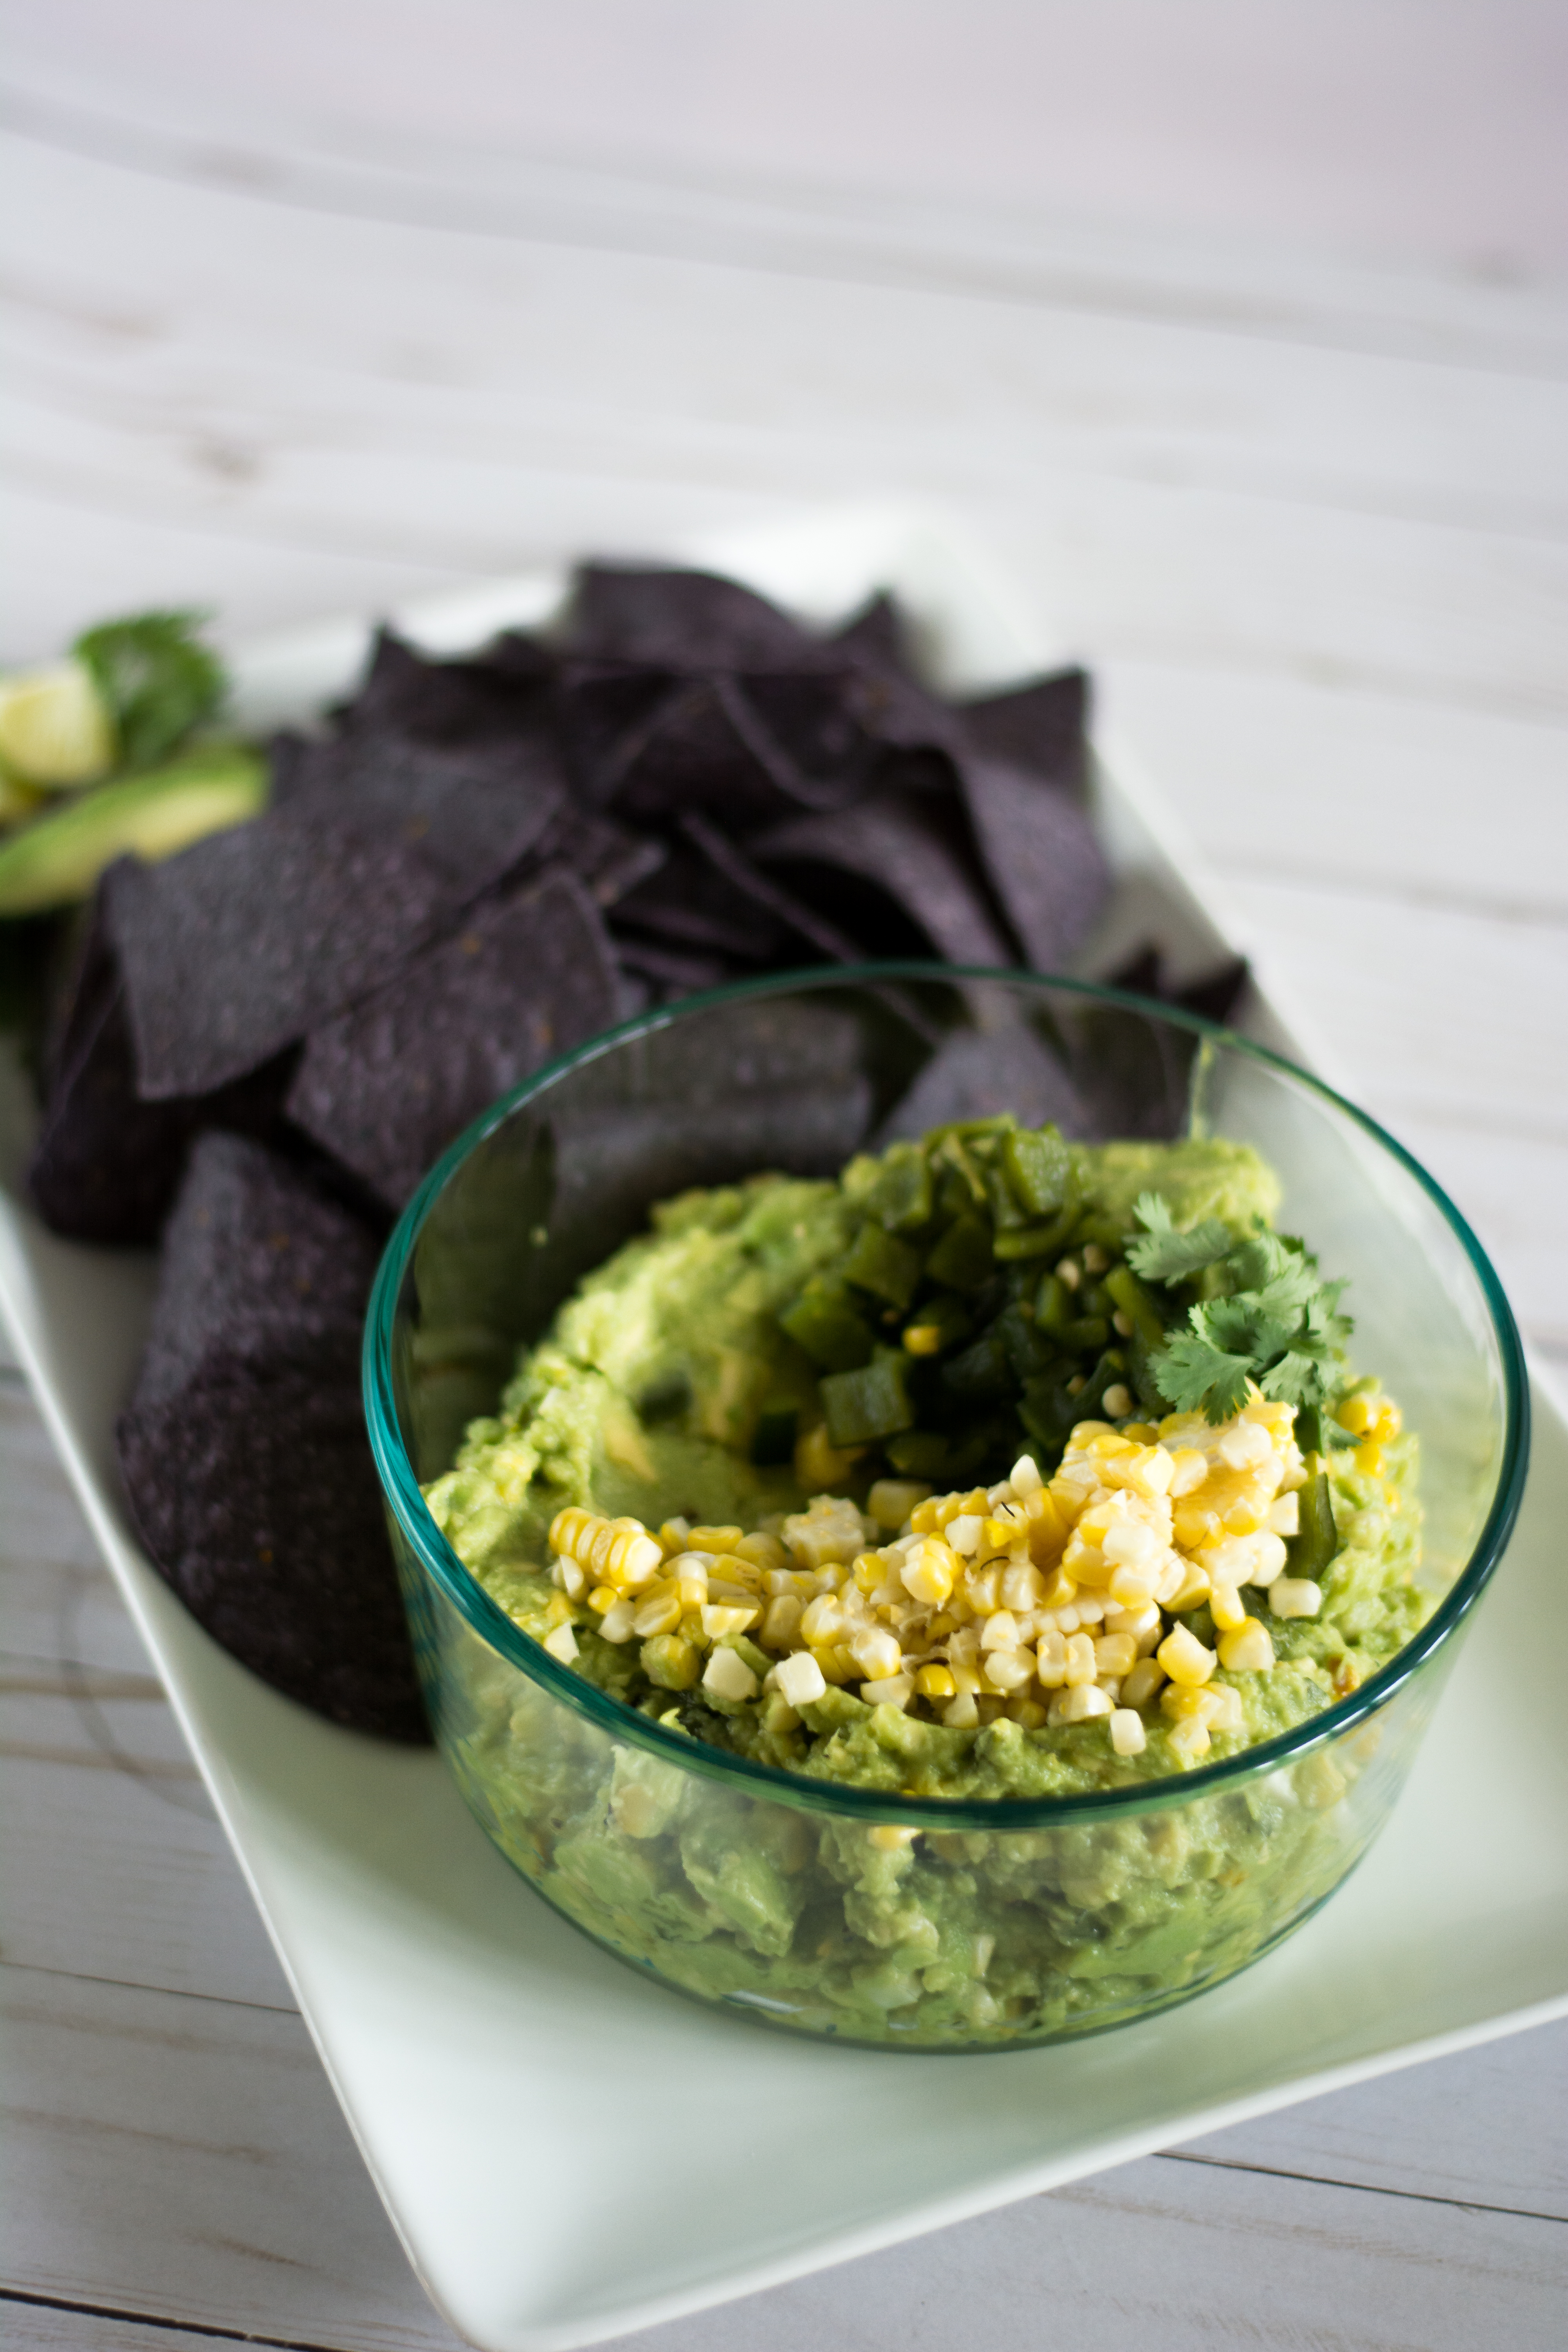
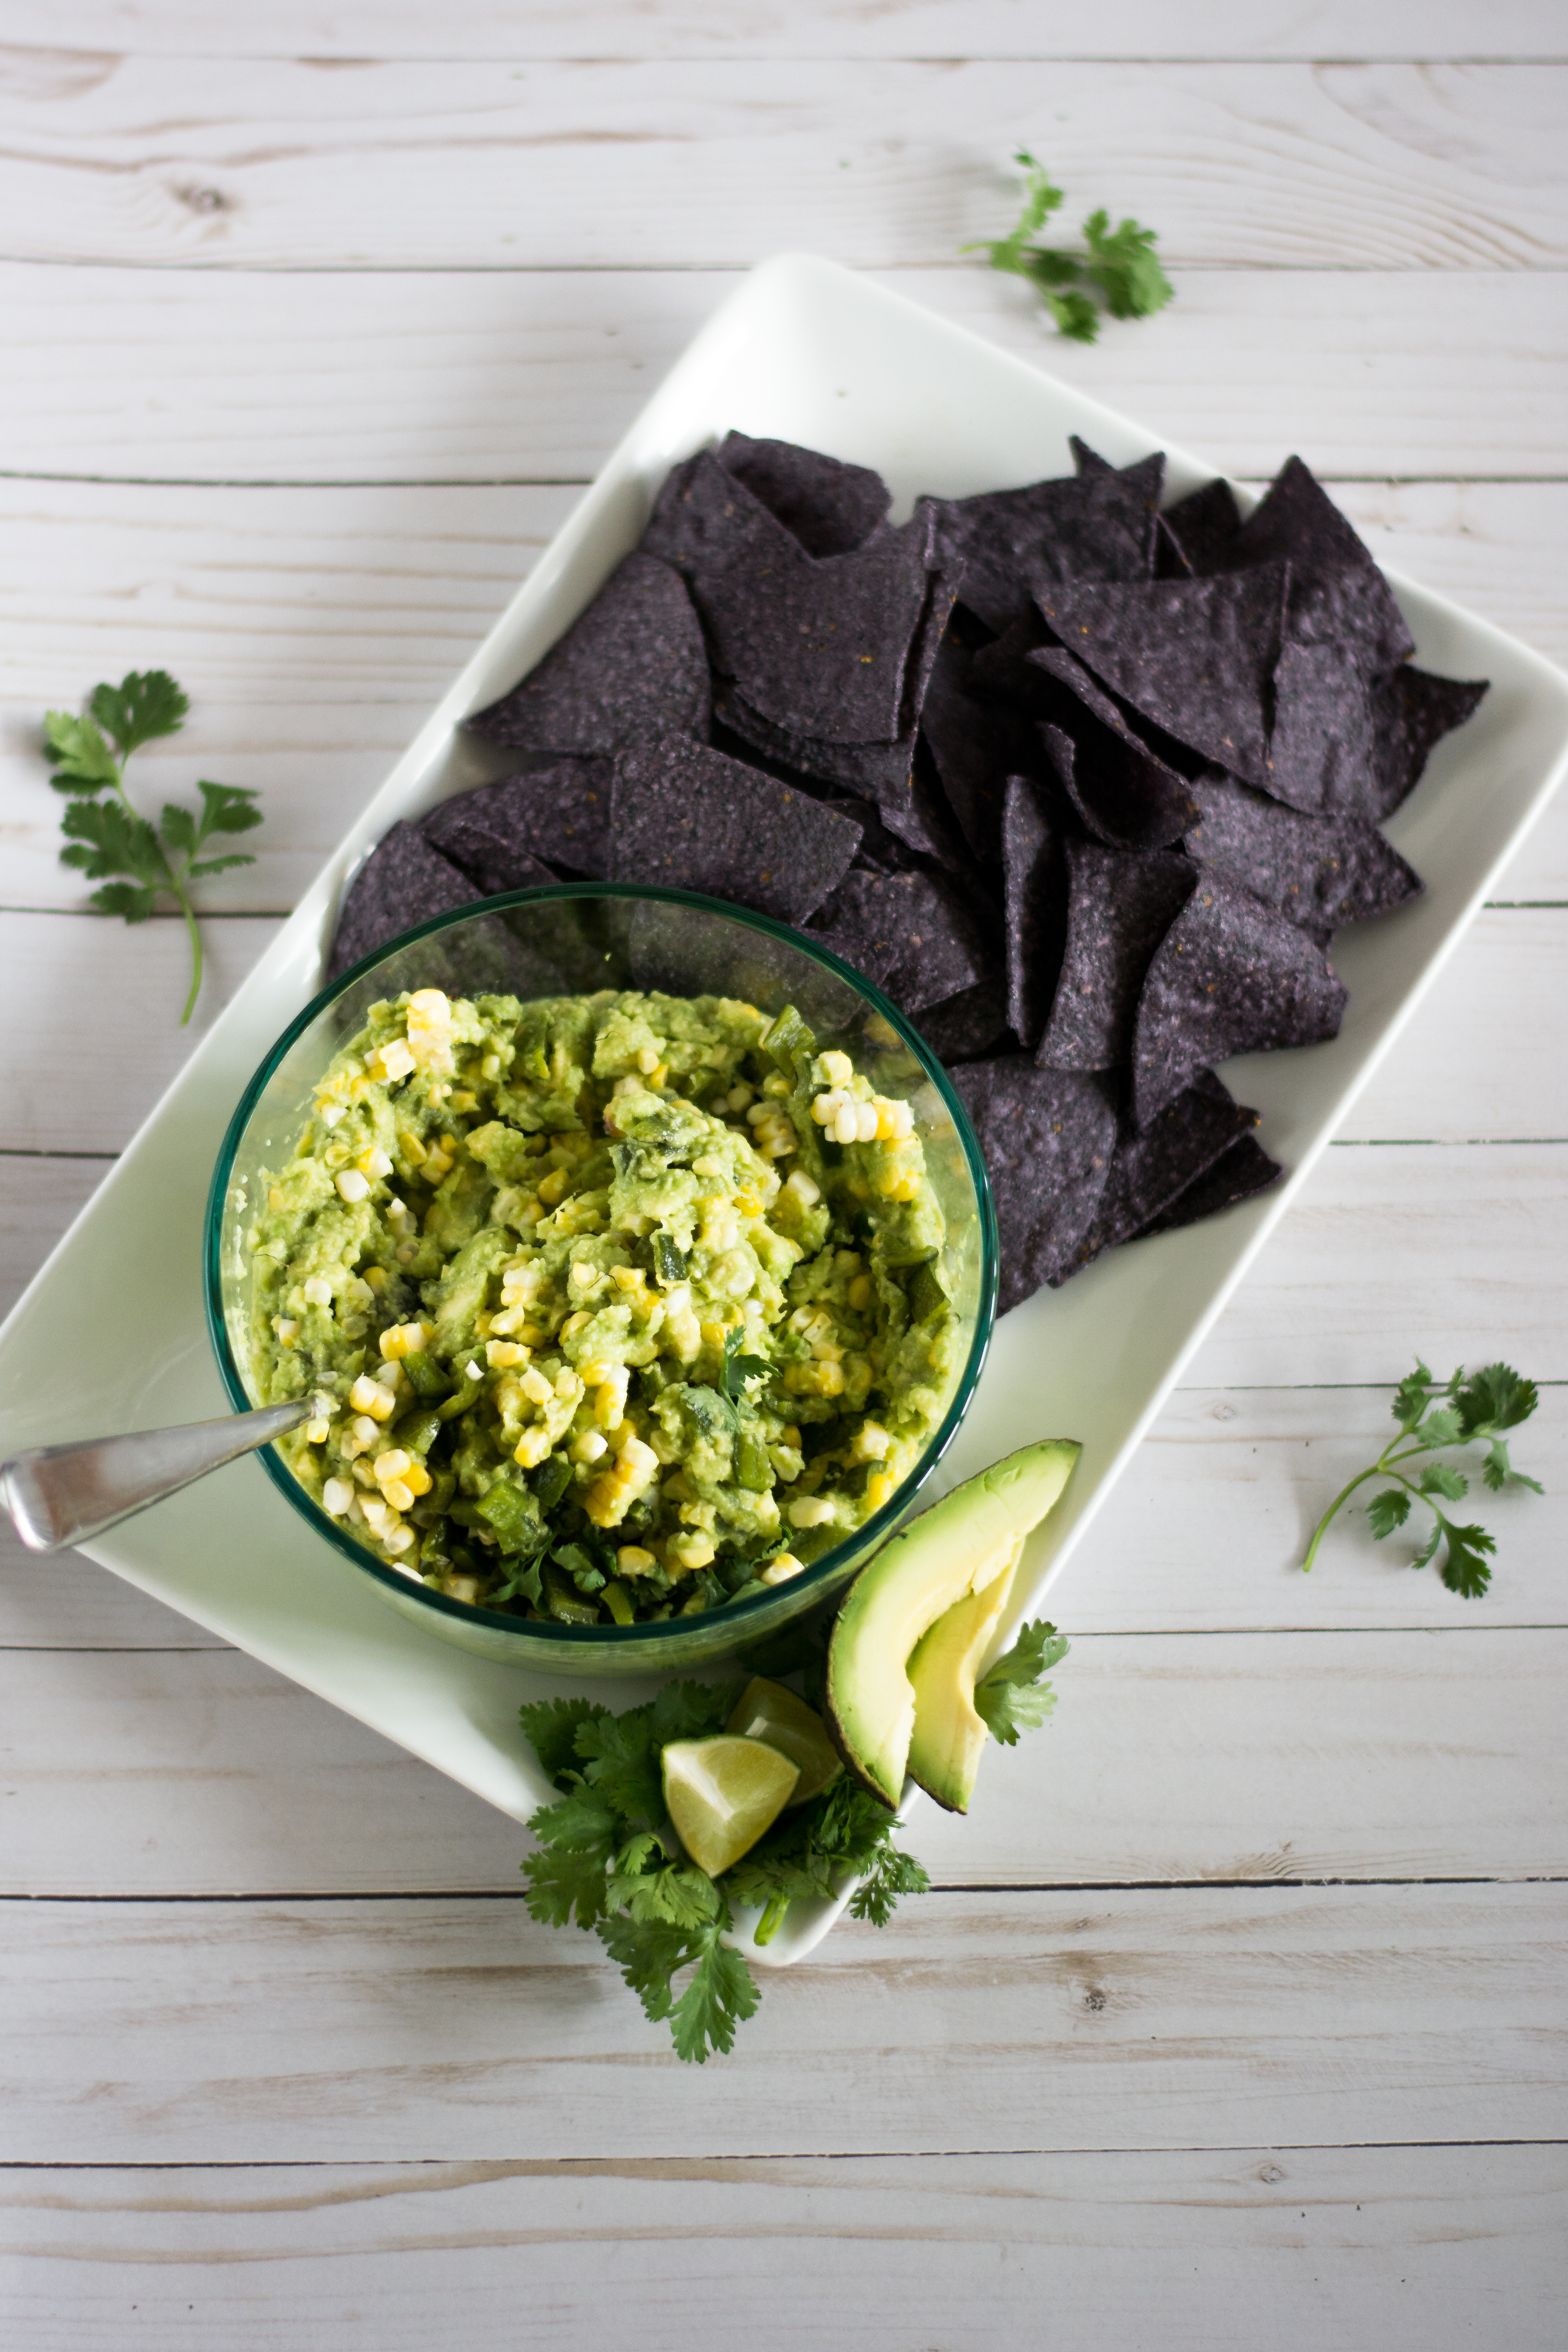
This guacamole was one of my favorite ways to use my grill unconventionally. And it was so good! It’s such an interesting combination and when we posted it, you could find both corn and poblanos at the farmers markets. When Ally and I shoot, we like to have others around to help us eat the delicious food, but we were content to take a guac-break this time and devour this whole bowl!
Photography by Allyson Regan
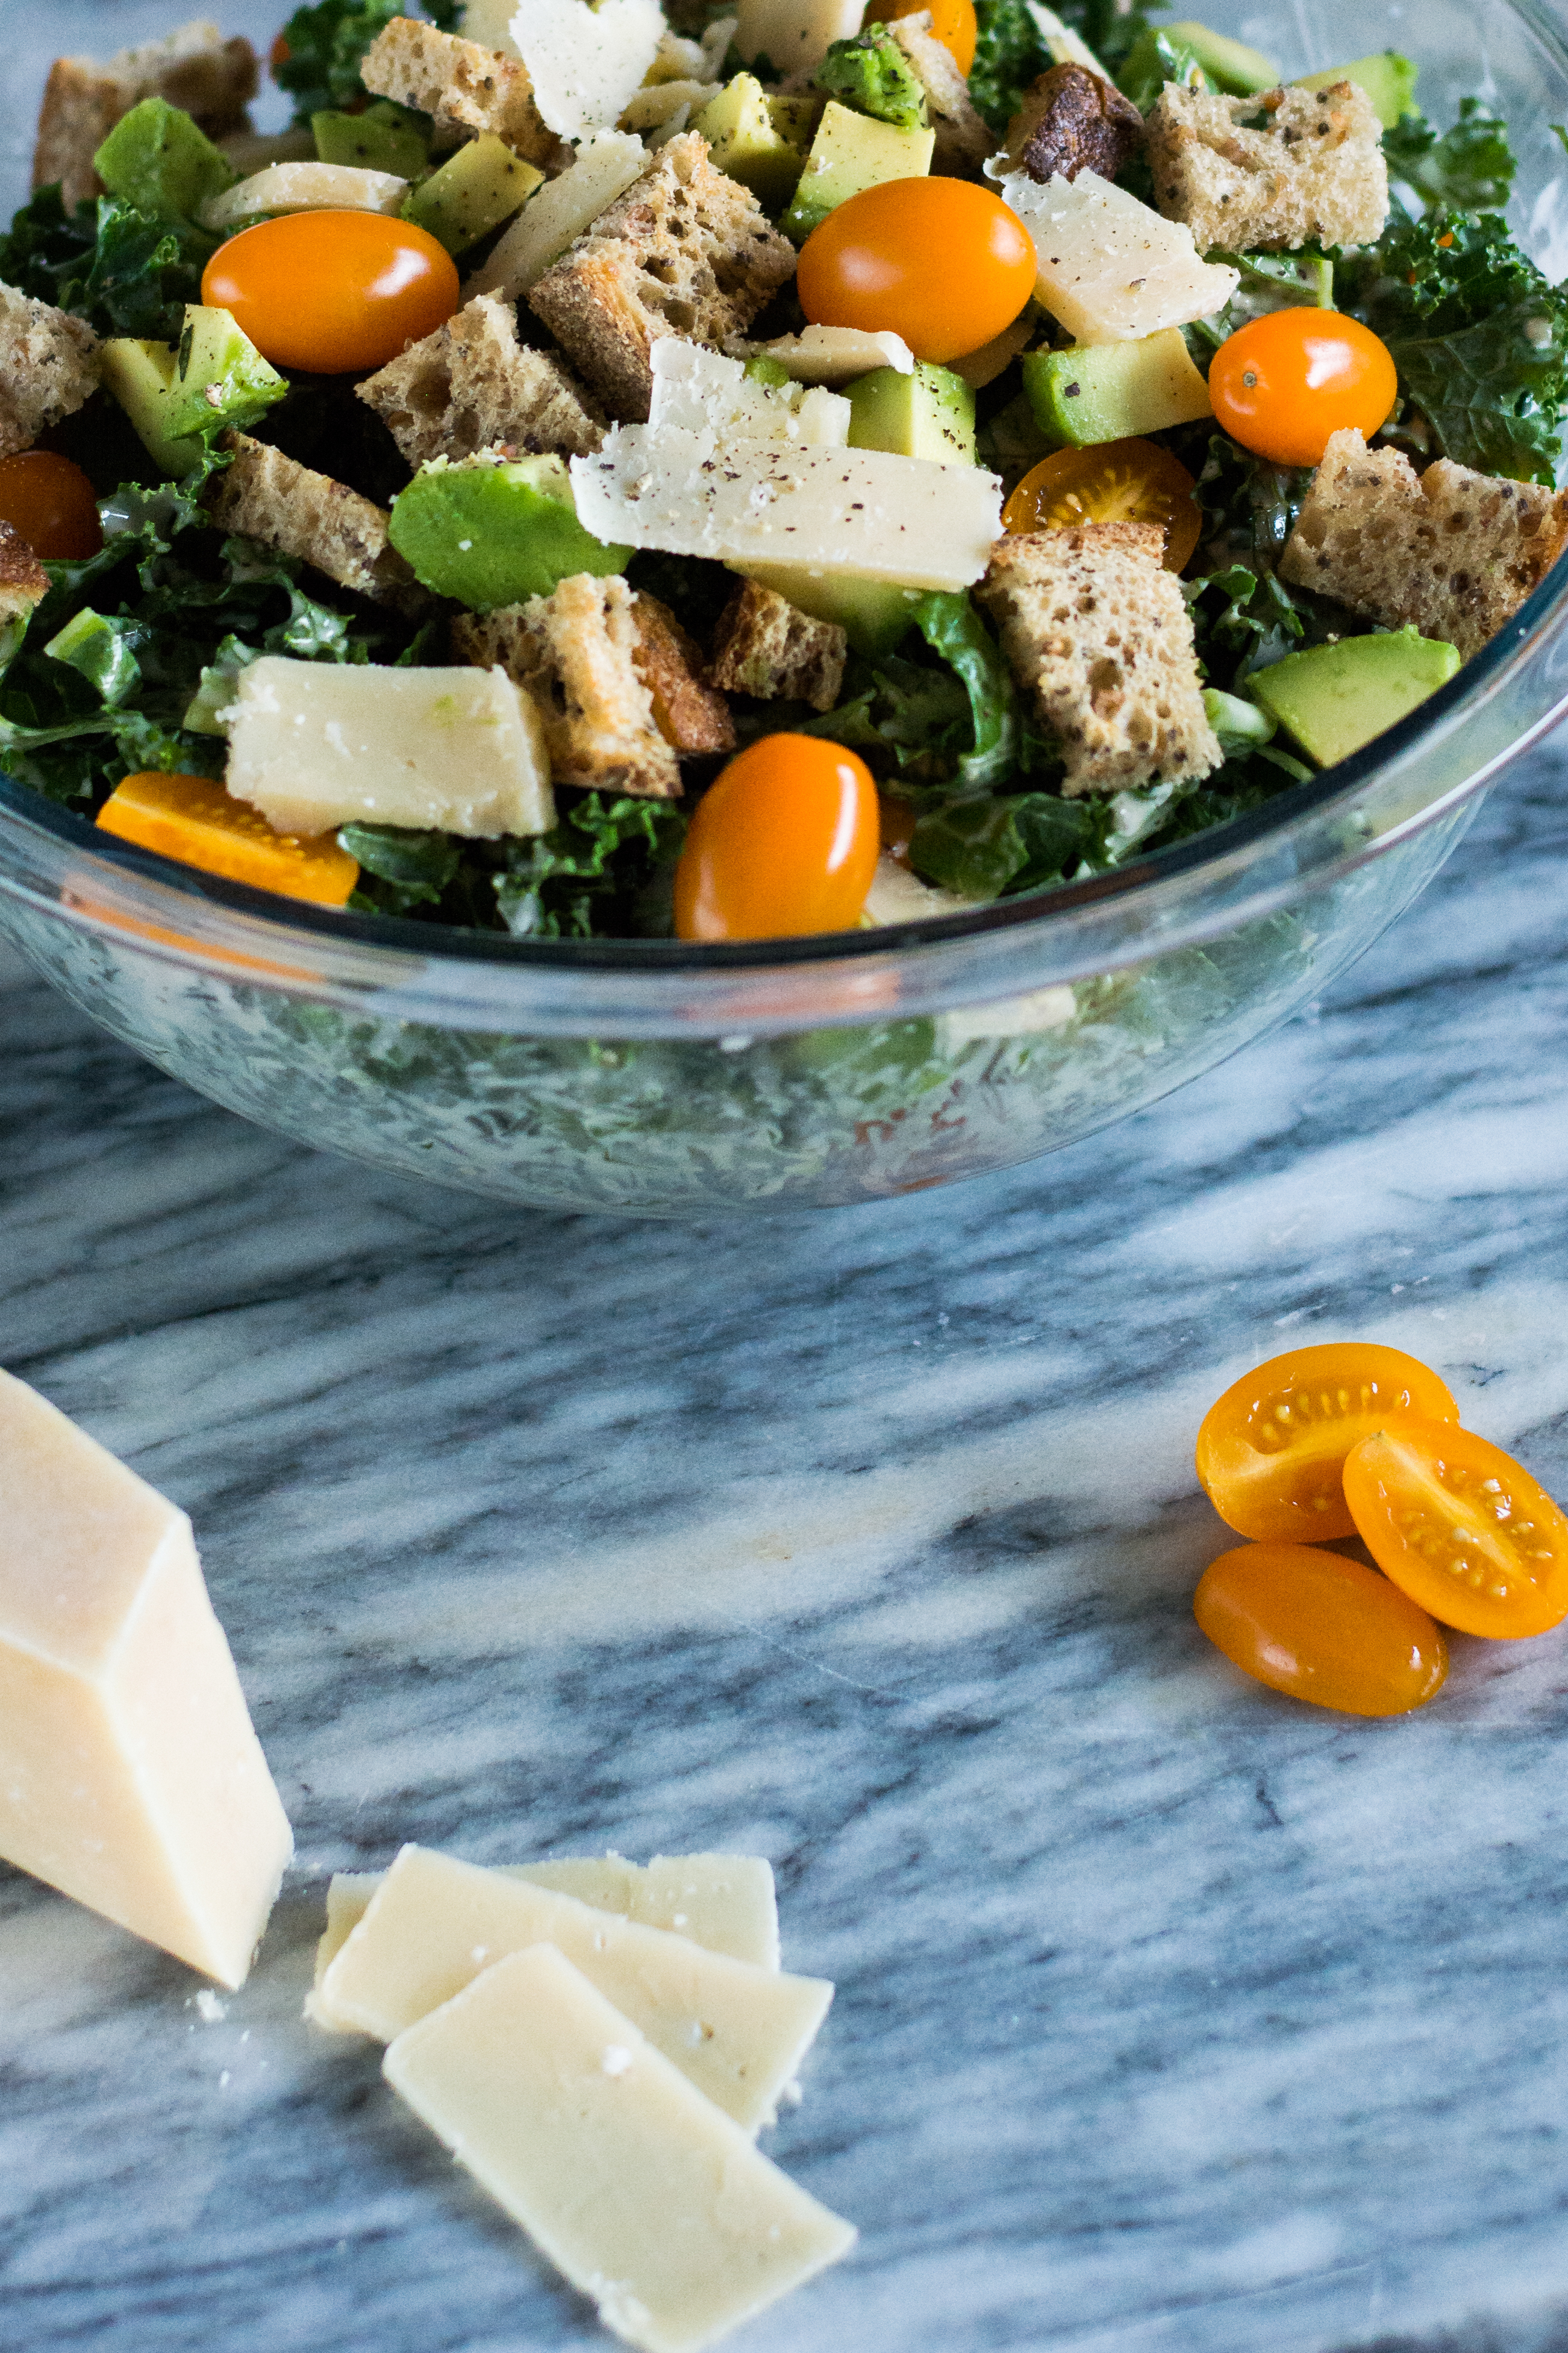
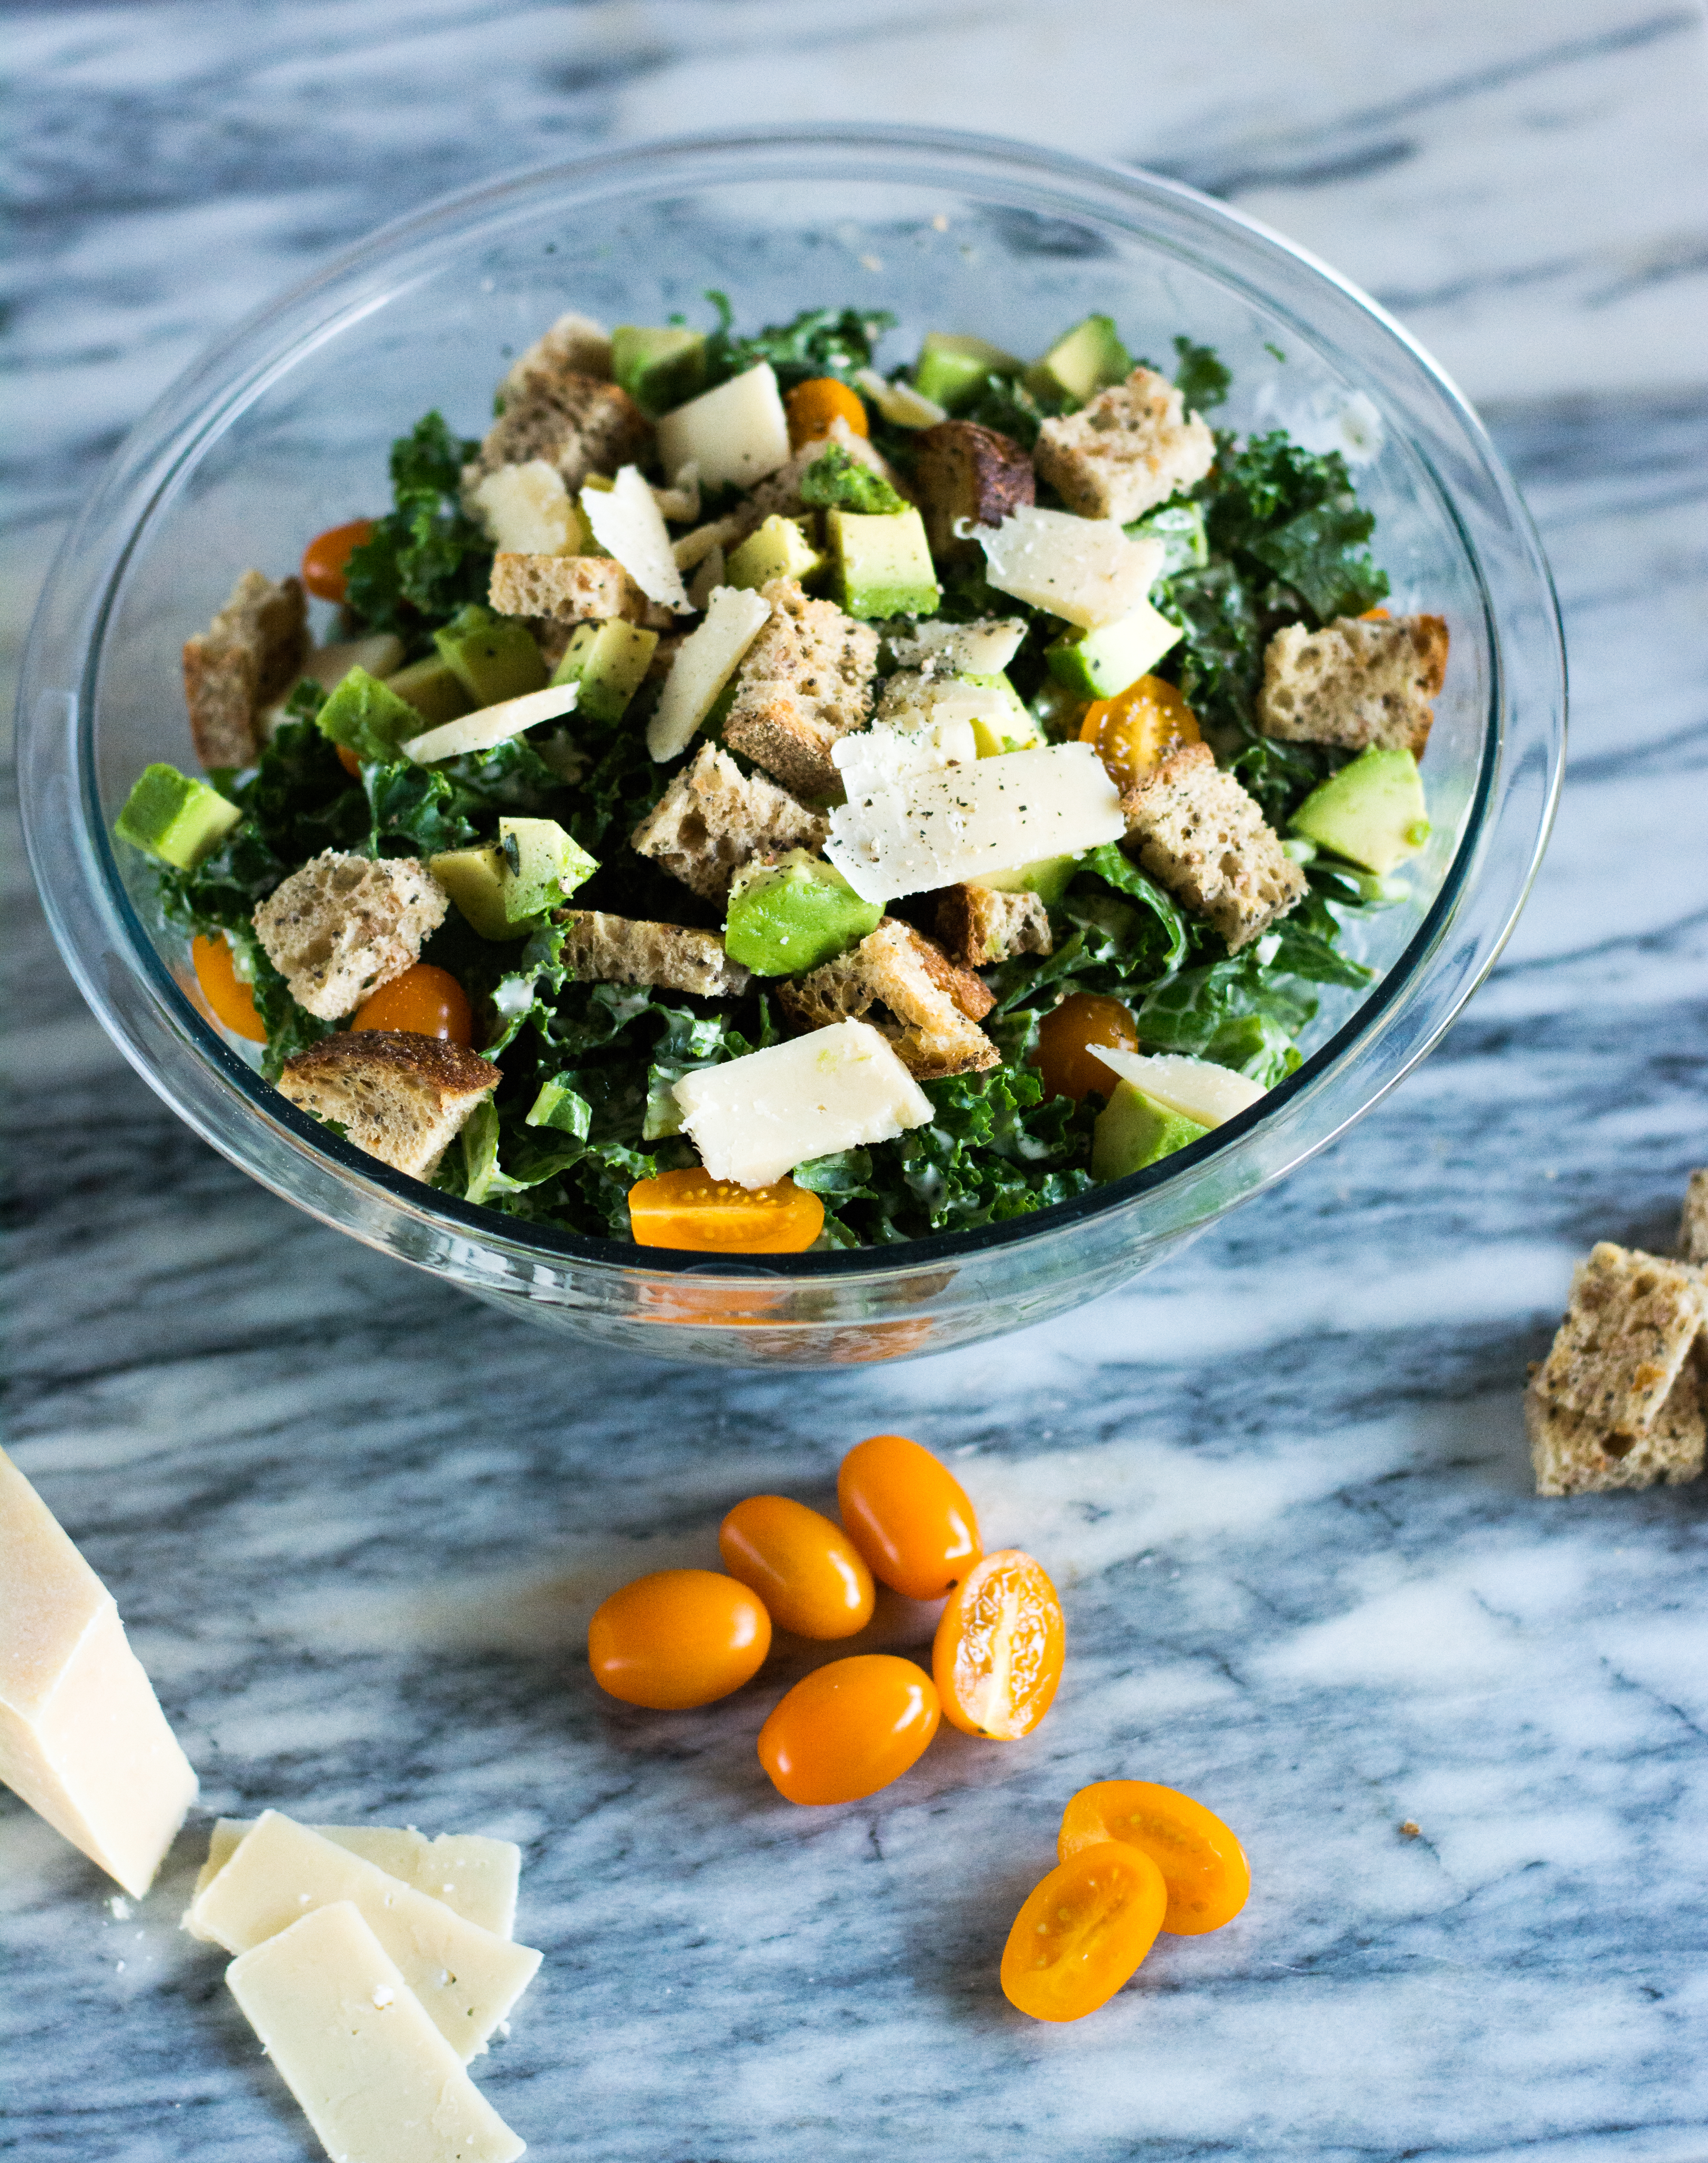
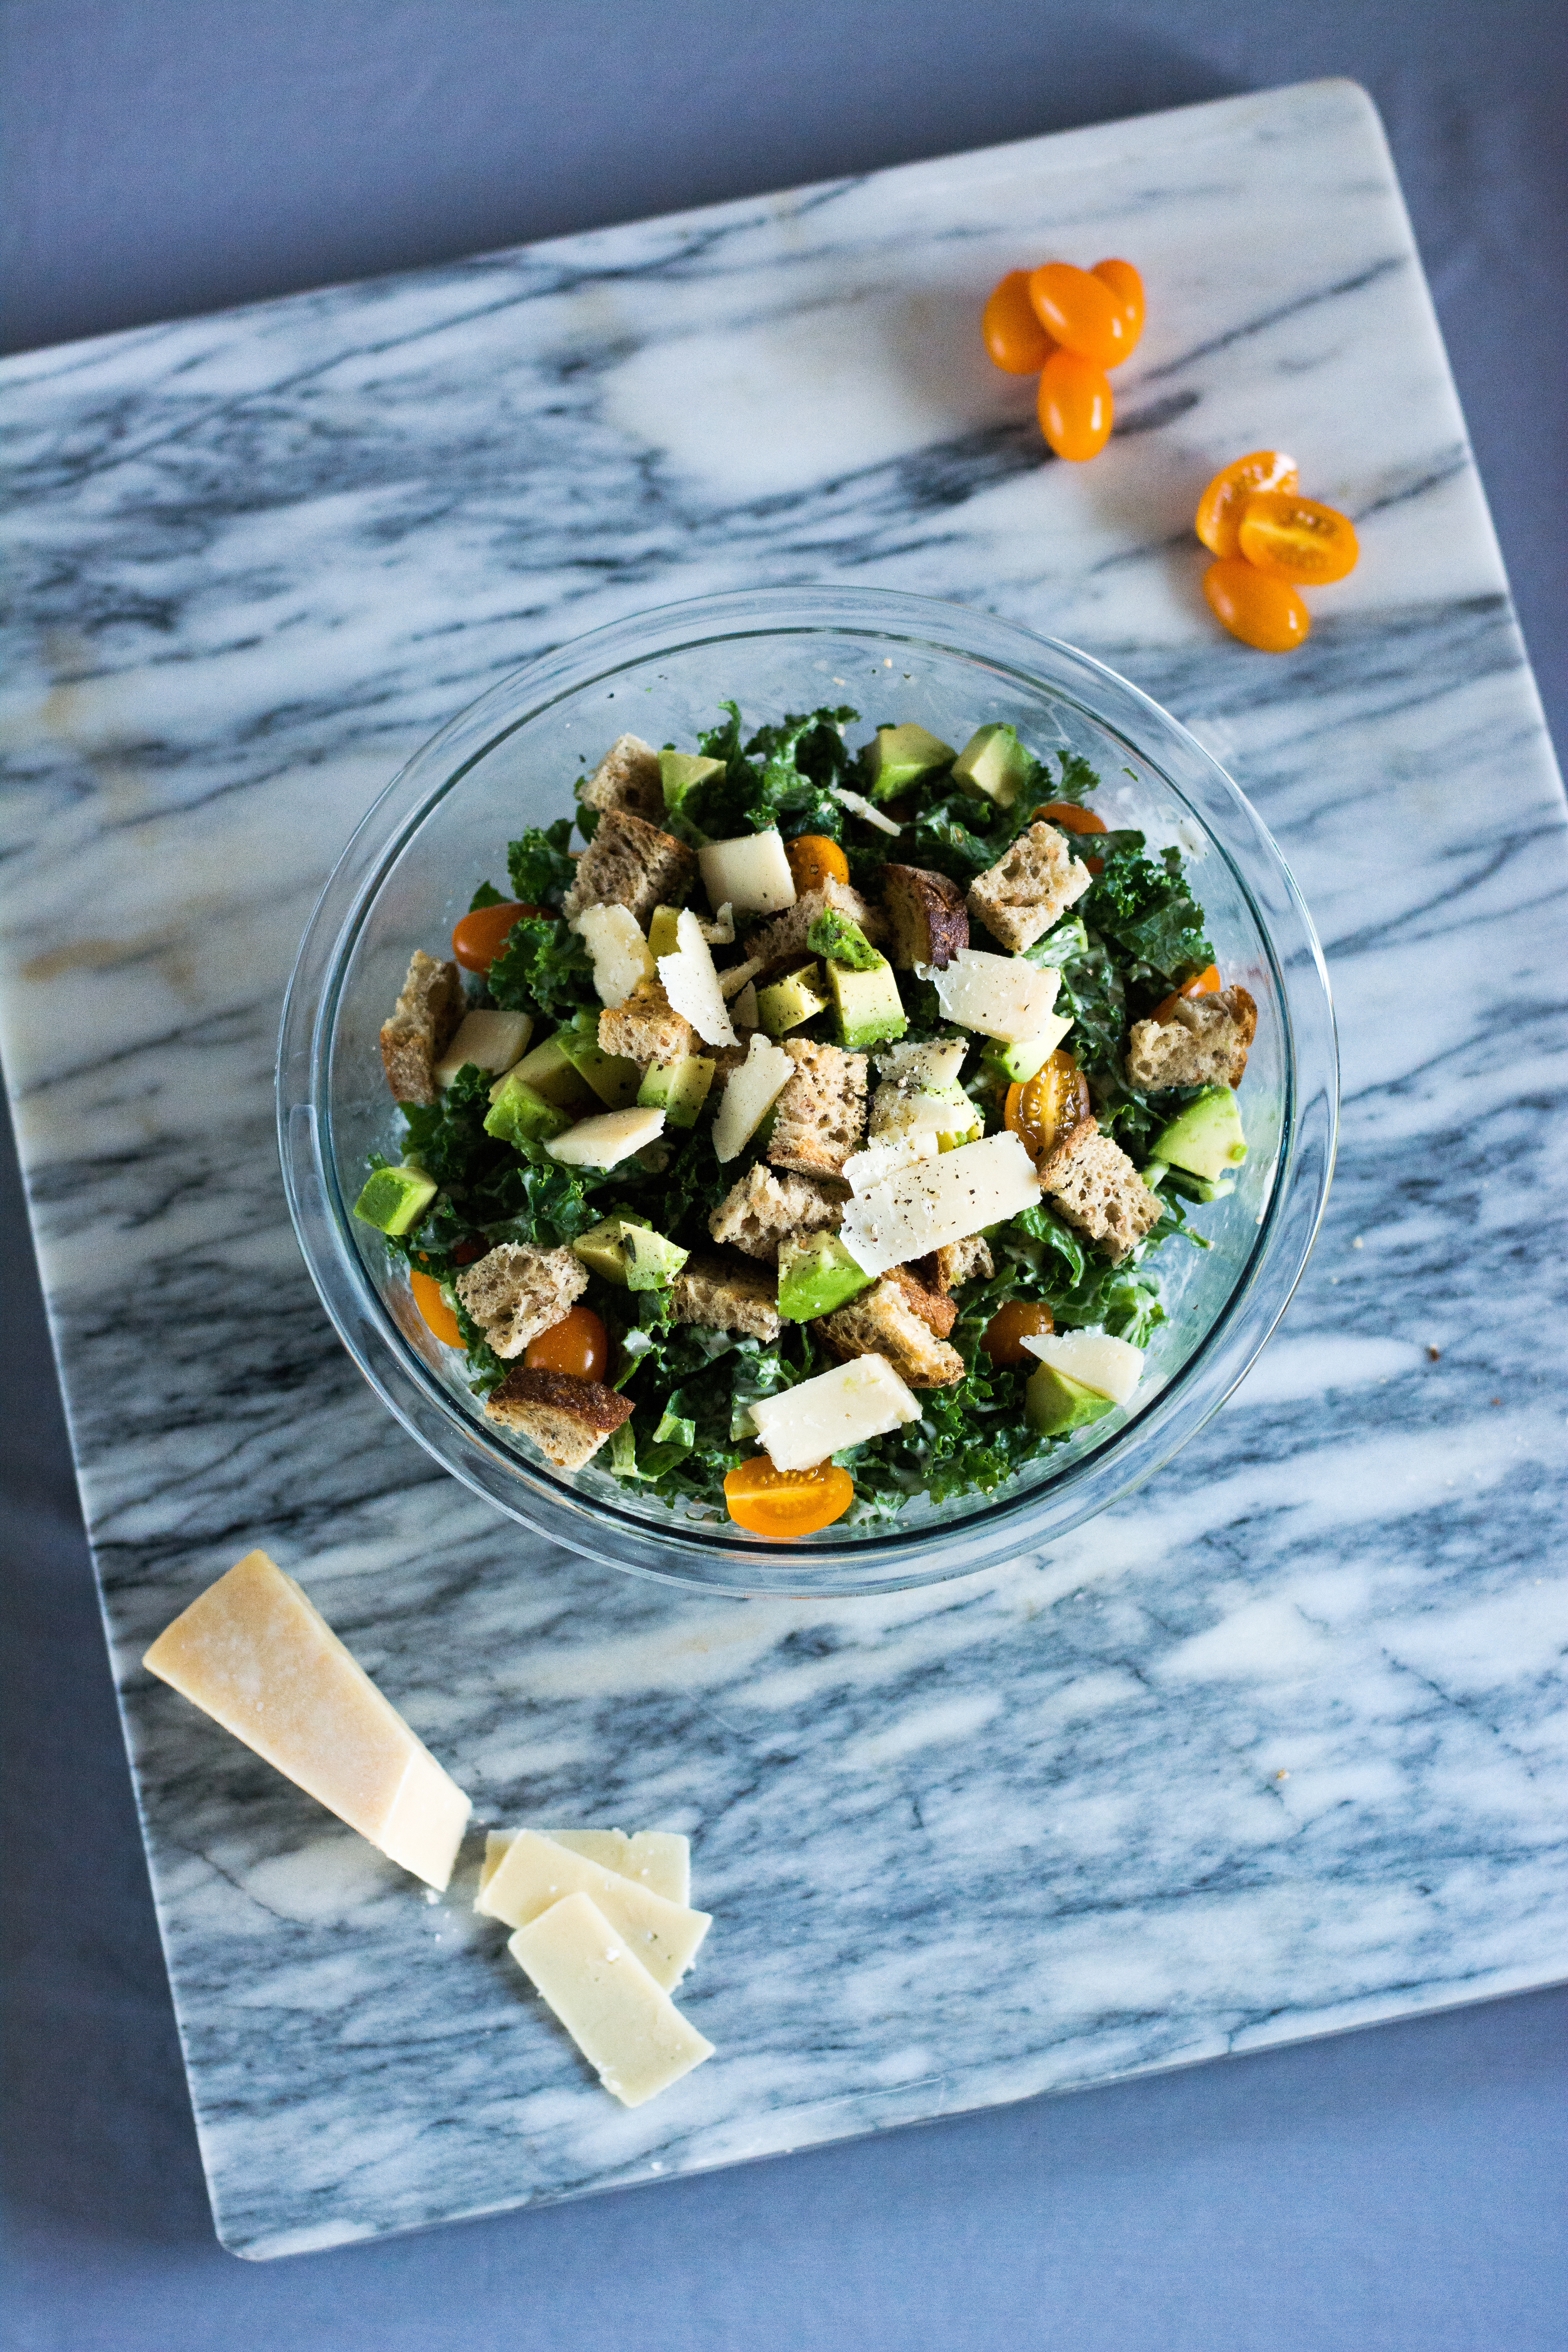
Next up is my Kale and Avocado Caesar Salad, which is so simple and so yummy! I think I ate this for a week straight before we finally posted it on the blog. Ally loves this salad because it’s filling and easy to prep for work lunches. You can also be so creative with this recipe, so it’s great to add it in to your meal rotation.
Photography by Allyson Regan
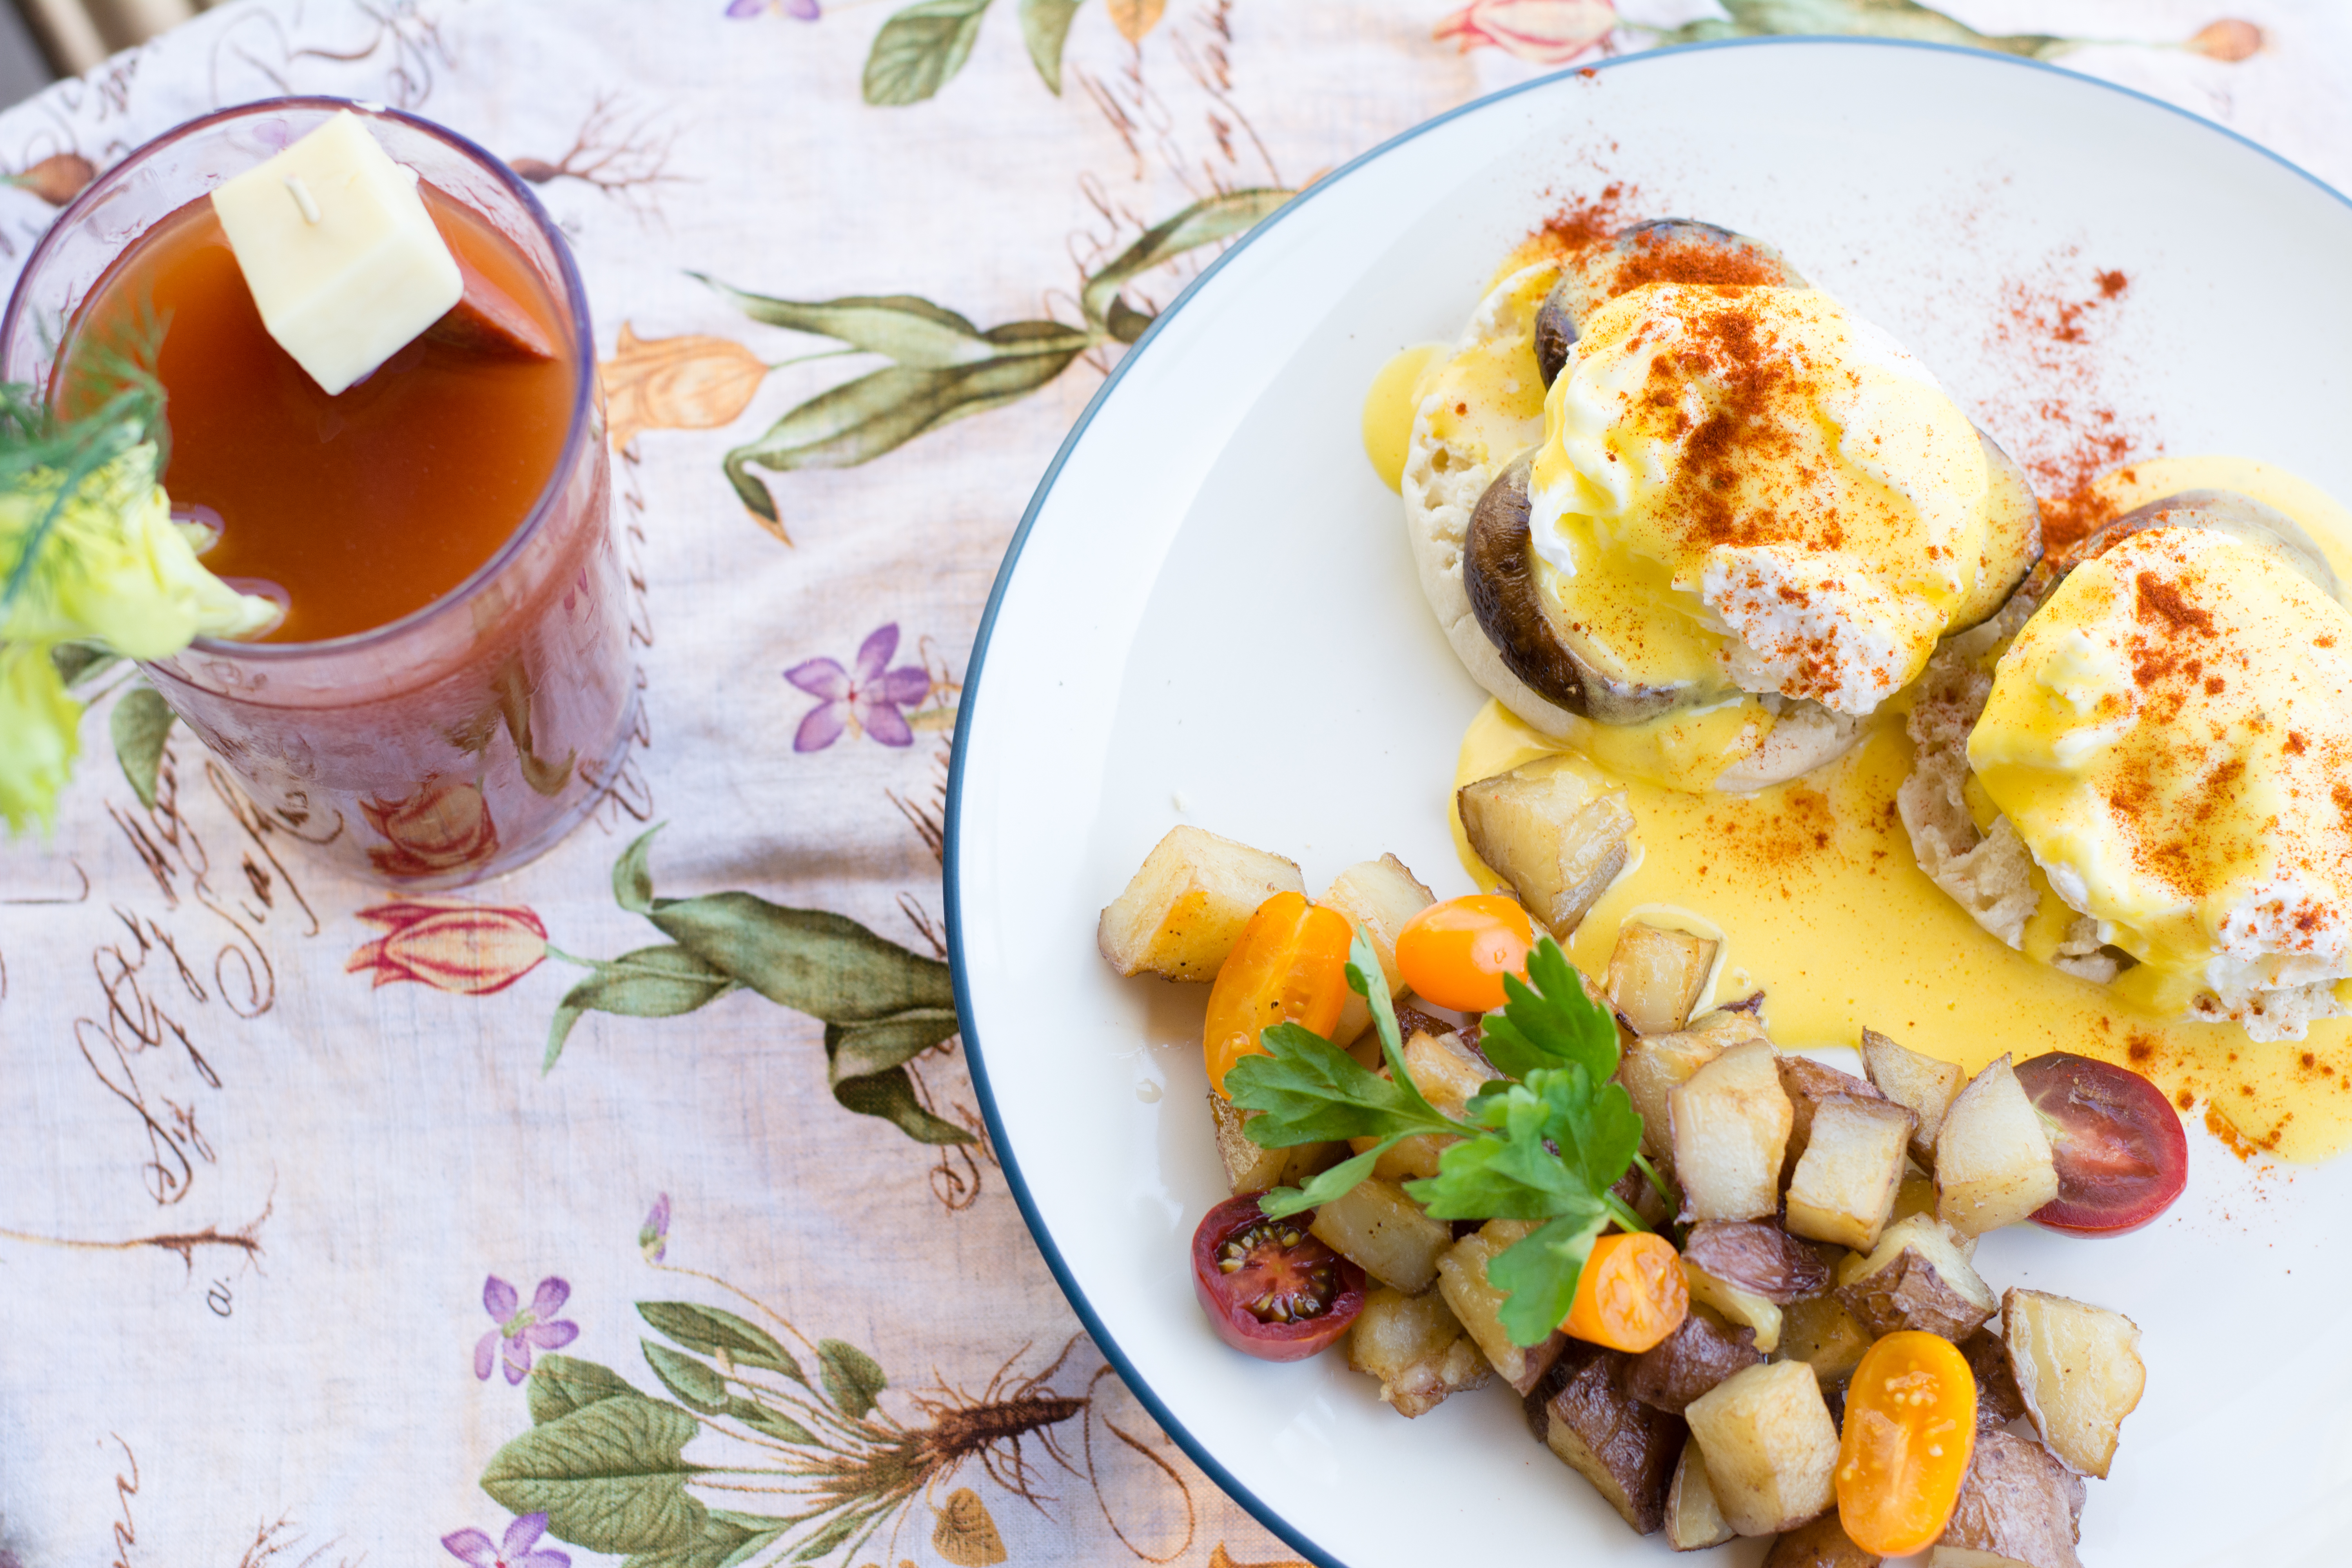
I couldn’t wait to post this Eggs Benedict Recipe because its just a classic breakfast staple that I think any foodie/home cook should try! Plus, it’s a huge crowd pleaser and it has that wow factor. Don’t forget, always make more hollandaise than you think!
Photography by Allyson Regan
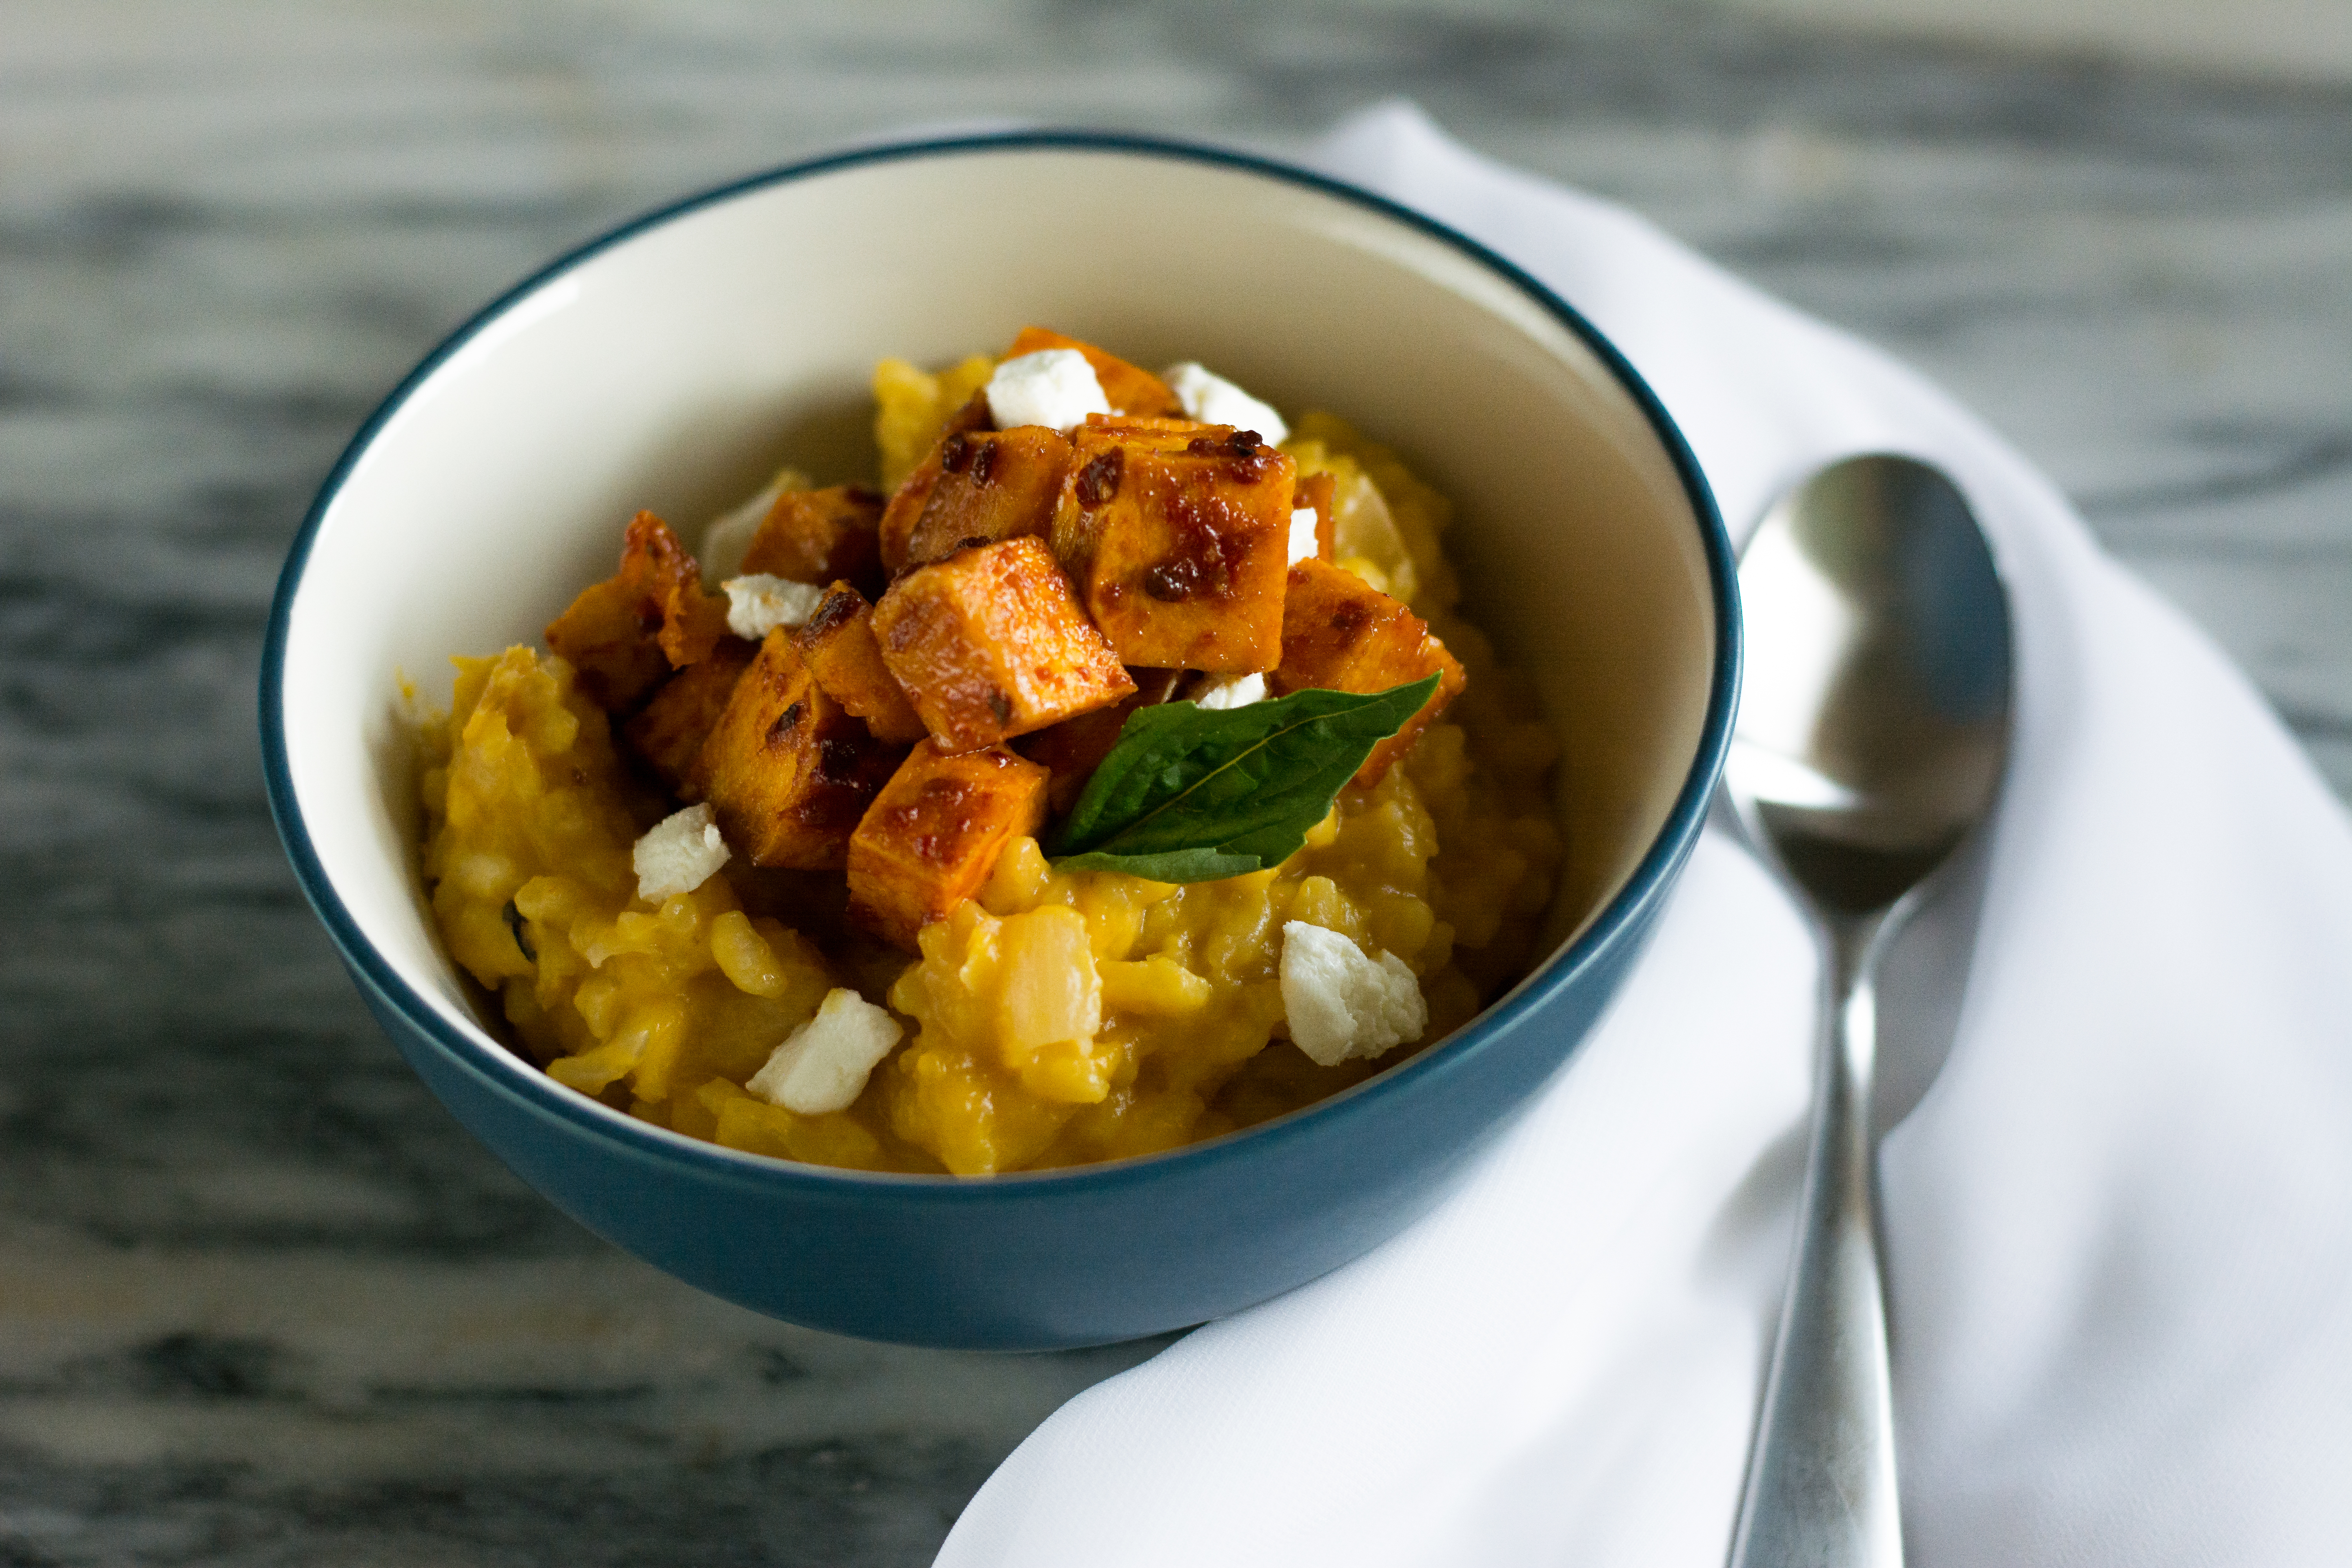
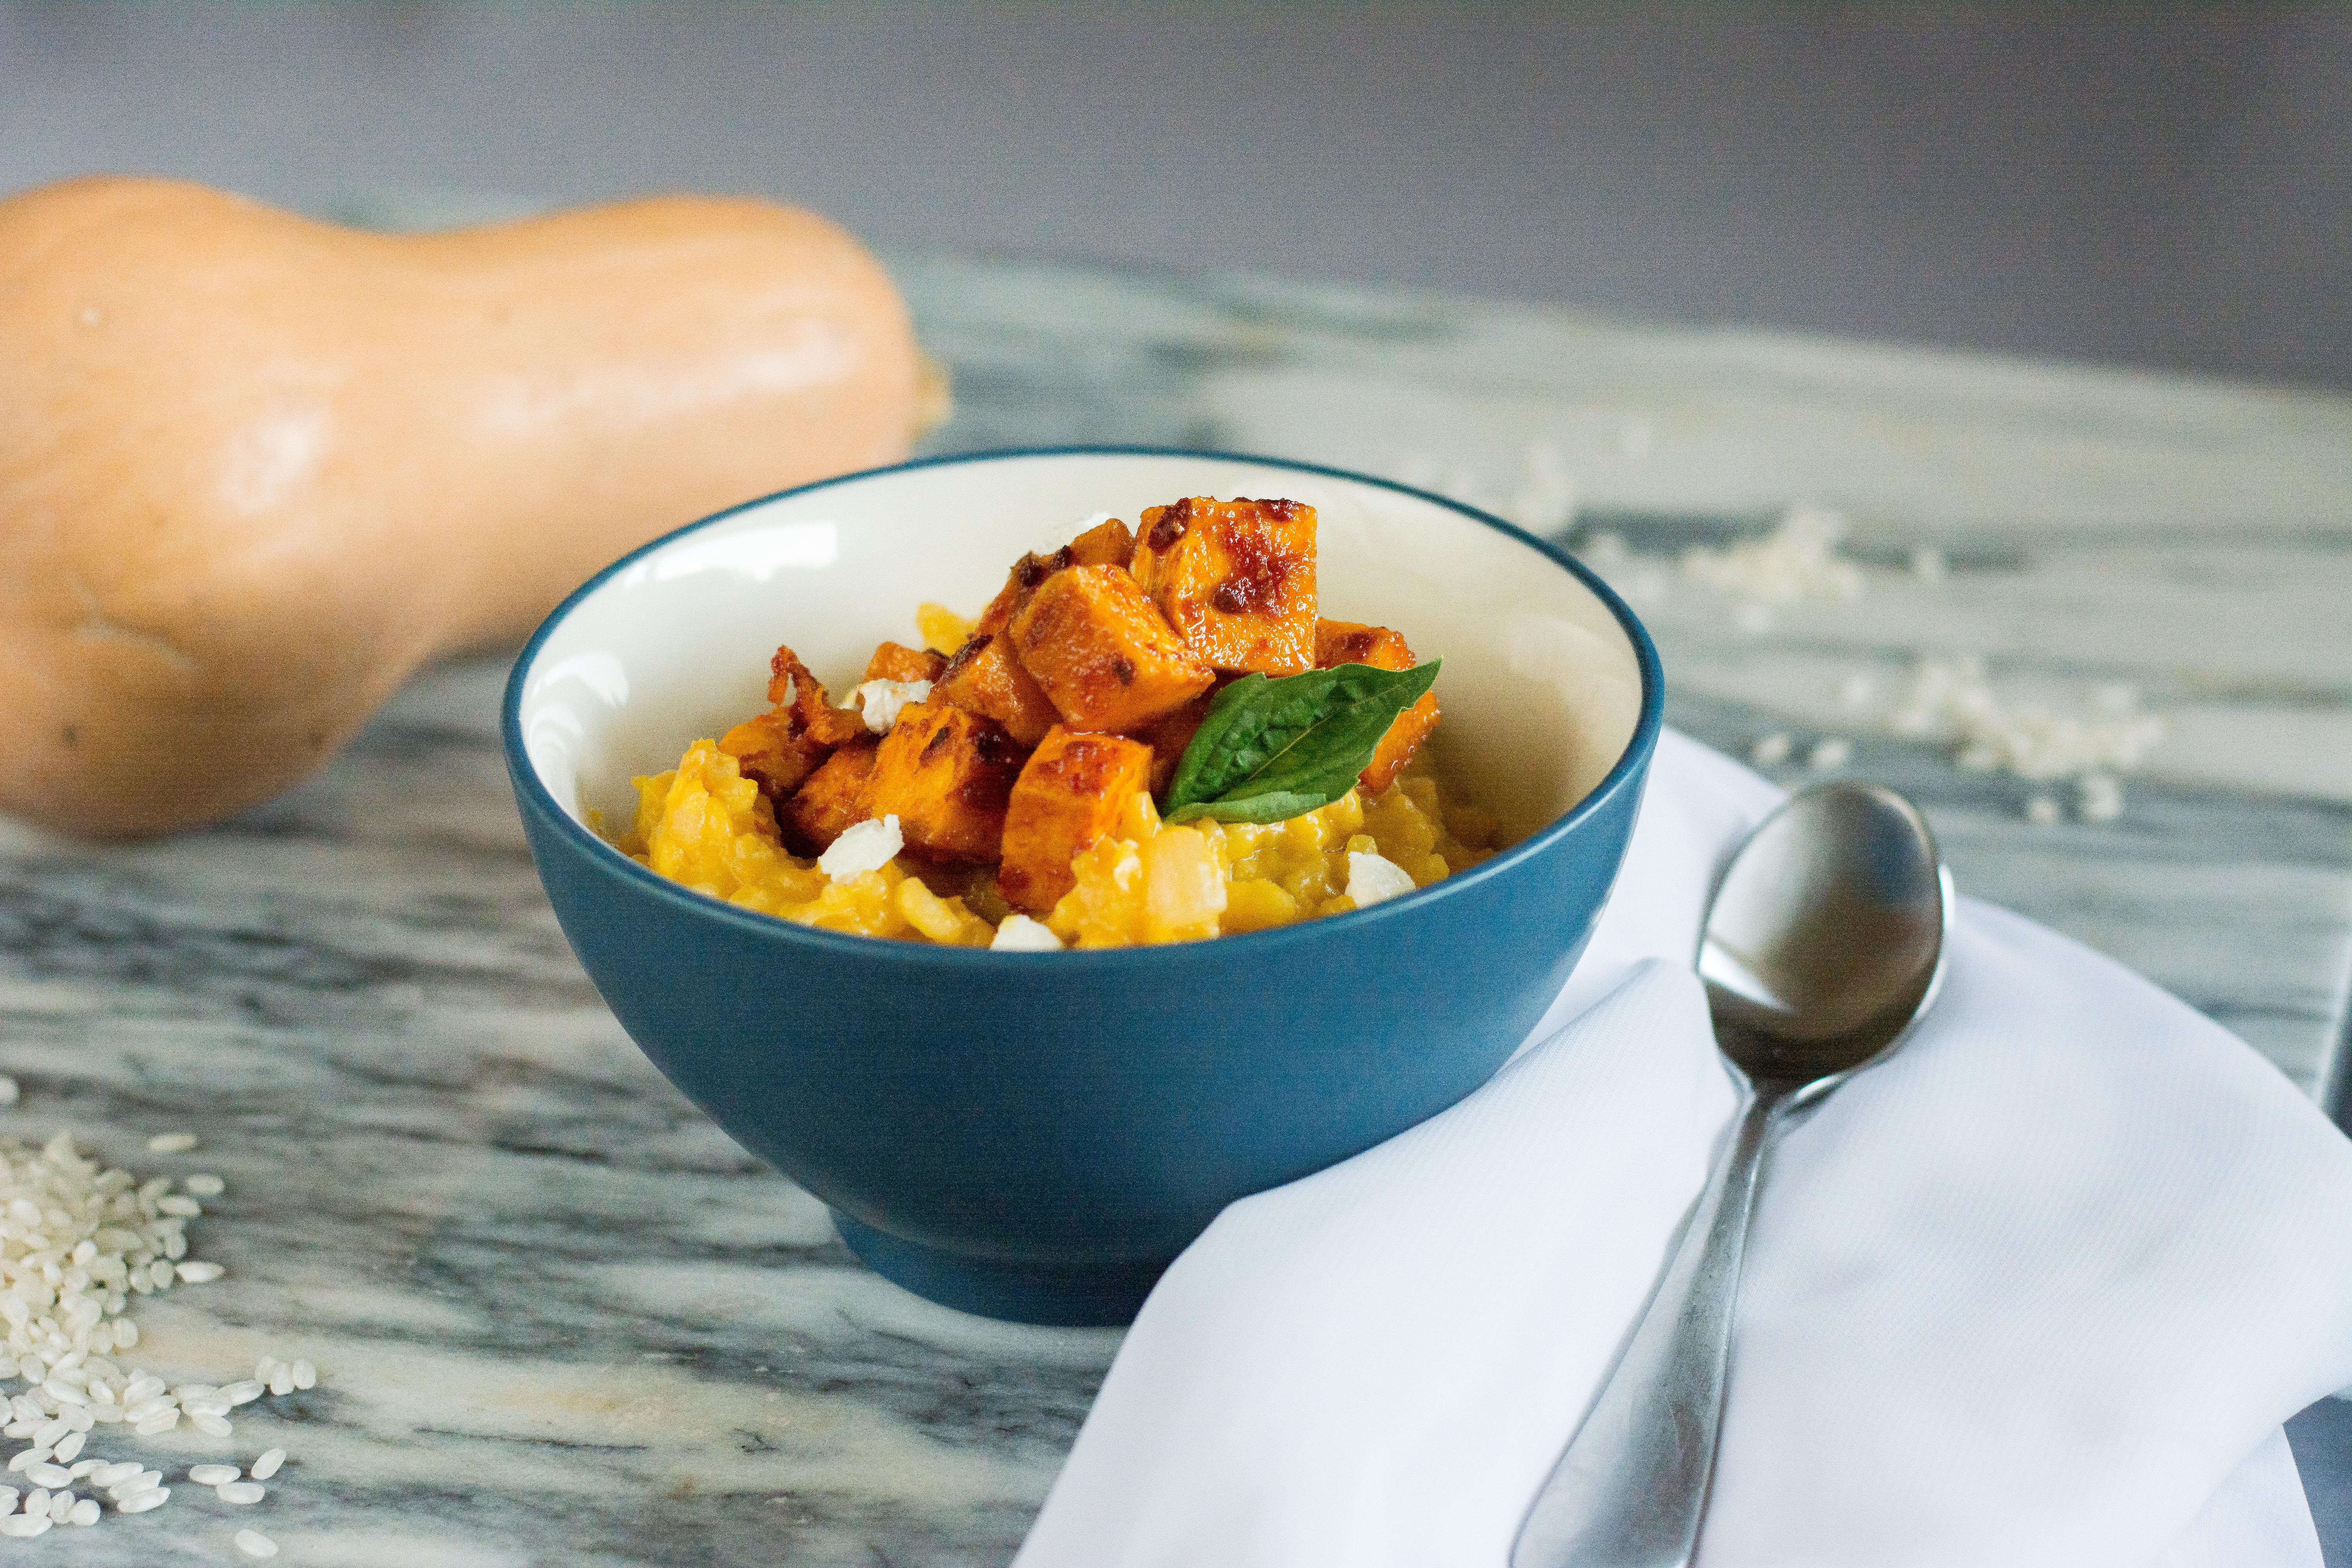
Chipotle and Butternut Squash Risotto was the perfect segue into fall cooking and baking. Risotto is one of my favorite dishes/meals to make and this version is definitely going to be repeated many times this fall. Can’t squash my fall spirit!
Photography by Allyson Regan
One of the most unique posts we did this month was a wine subscription review of Bright Cellars. This was so cool because I love this service and it was fun to share with you all! It was a little different than the regular posts that I do, but I want to start doing some more fun posts like this! If you have any products or services that you love that you think I should check out or review, let me know in the comments!
I know that we posted a lot of delicious recipes in September, but look for a couple more unique posts in October!
It’s finally the weekend!!! Let’s celebrate what could possibly be one of the last summer-y Saturdays this year! Well, I guess today is officially the beginning of Fall, but it still feels like summer. Also, brunch. Need I say more?
Photography by Allyson Regan
Eggs Benedict is one of my husbands favorite things to eat during the weekends. It is a bit of a labor of love, but I do love the end product! Weekends are made for cooking because you have so much more time than during the weekdays. And nothing pairs better with brunch food than bloody mary’s. So if your hosting brunch this weekend or just want to enjoy your time away from the office, check out Mimosas: Otherwise It Would Just Be Juice or Bloody Mary Bar DIY to step up your weekend goals.
Photography by Allyson Regan
The classic eggs benedict includes several key components. You’ll need an english muffin, preferably with nooks and crannies, Canadian bacon (or some kind of protein), hollandaise, and a couple of perfectly poached egg. You might need some practice with a couple of these components before you’ve mastered this breakfast classic. There are some shortcuts, like using a fried egg instead of the finicky poached egg, using a hollandaise mix instead of homemade, or just going out to breakfast instead of making it yourself. Now, I’ve eaten quite a bit of eggs benedict in my 24 years and once you make your own hollandaise, you can totally tell when a restaurant uses the pre-made mix.
Eggs Benedict
4 whole eggs
8 slices of ham, or Canadian bacon, or veggie sausage
2 english muffins
4 egg yolks
1 1/2 sticks of butter
1 lemon
Frank’s Hot sauce, or another hot sauce
salt and pepper
white vinegar
paprika (optional)
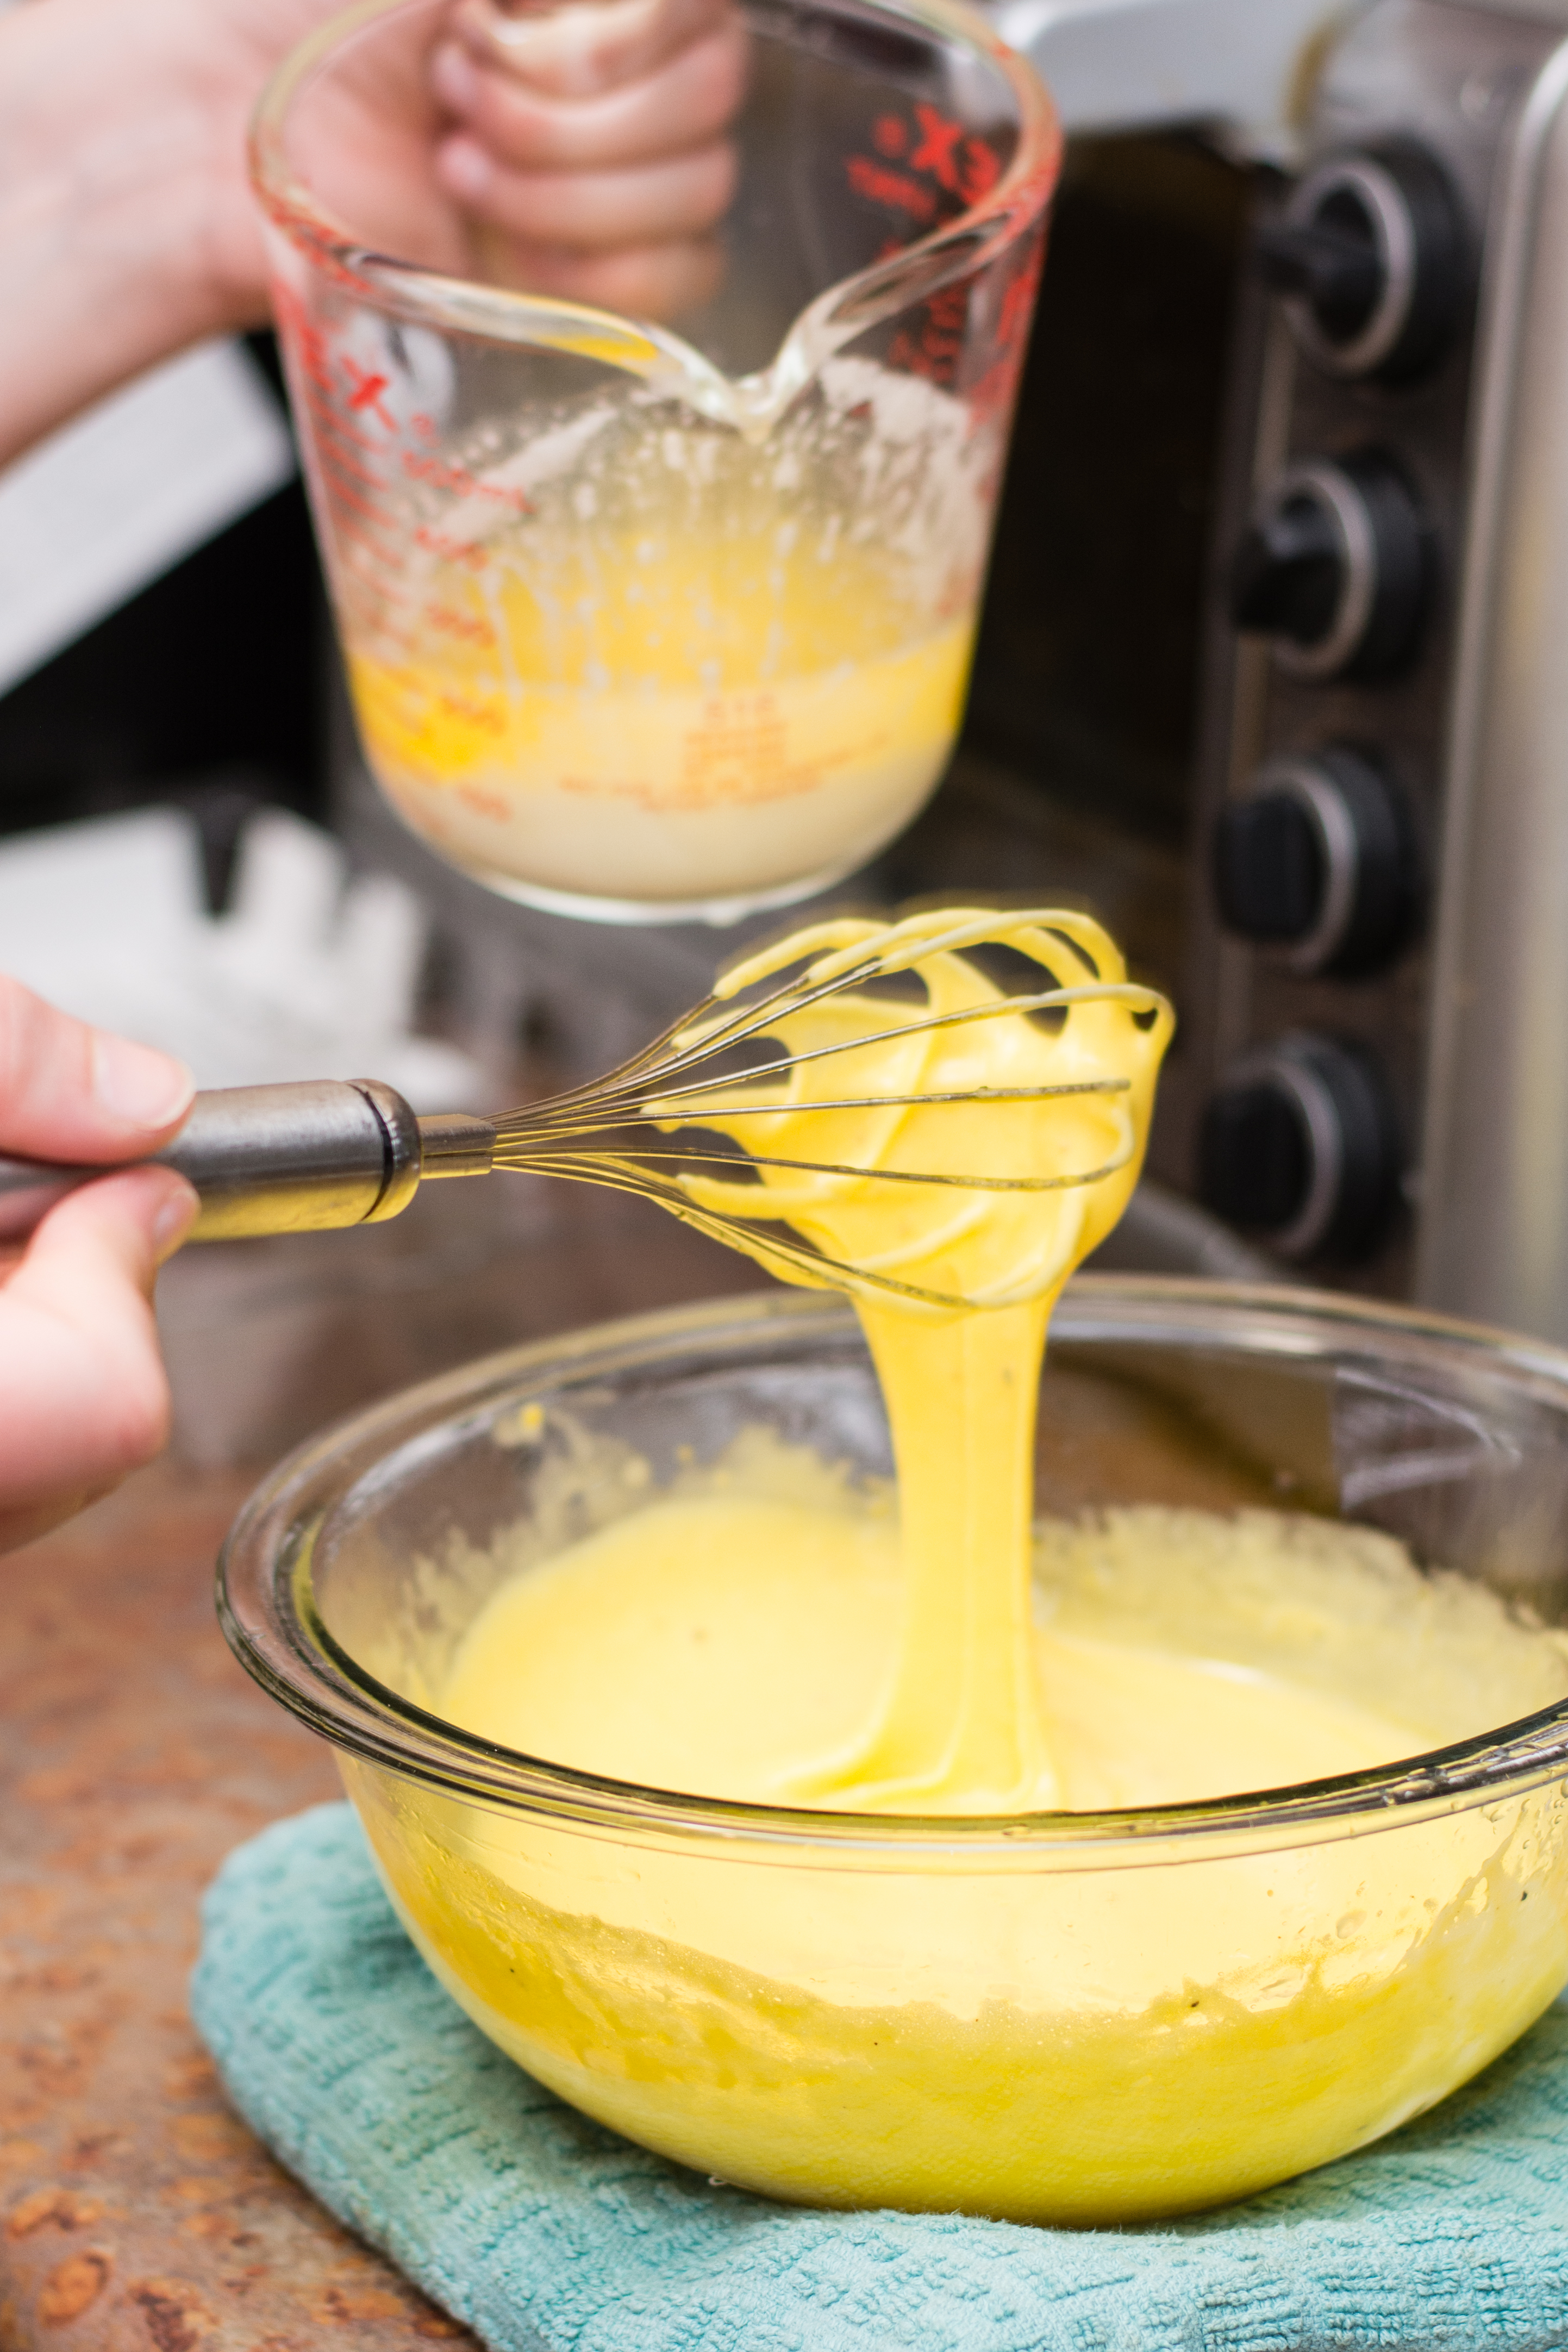
Begin by melting the butter over low heat taking care not to boil it. Split your english muffins with a fork (this helps to preserve those nooks and the crannies). Place your 4 egg yolks in a medium glass bowl. You are going to place this bowl over a medium pot of simmering water so make sure that it’s a good fit. Get your water for this on the stove and simmer over medium heat. Place the ham slices in a skillet to warm and brown a bit. You’ll also need a medium pot full of boiling water with a splash of white vinegar. The vinegar helps to coagulate the egg white faster and not to get too technical (even though the science behind this is really cool!) it will help you to produce a perfect egg.
Photography by Allyson Regan
You’ll want to start the hollandaise before poaching the egg. Begin by whisking the egg yolks with a metal spoon. Whisk until they start to lighten in color. Place over the simmering water, whisking constantly. Slowly add in the melted butter while continuing to whisk well. Remove from heat anytime you feel like the eggs might be getting chunky but continue to whisk. I normally go back and forth between the heat several times. You’ll know it’s done when it becomes thick and pale yellow. Remove from the heat and add in a squeeze of fresh lemon, several shakes of hot sauce, and salt and pepper. When you taste it, it should be slightly lemony, very buttery, and you shouldn’t necessarily taste the hot sauce, it just helps to round out the flavor.
Photography by Allyson Regan
Toast your english muffins and begin to poach your eggs. To poach, crack your eggs one at a time into a small bowl. Once you drop the egg into the water, swirl the water with a spoon to create a mini whirlpool. This will help the whites to coagulate together, instead of spreading out in the pot. You don’t have to poach eggs easy, the longer you simmer them, the longer the yolk will cook.
To assemble, place the toasted english muffins on your plate. Place the warmed ham slices on them and then top with the poached egg. Drizzle a healthy portion of hollandaise on top and sprinkle with paprika. Because this is such a prep-heavy breakfast, I like to make sure the side is easy. I normally go for oven baked home-fries or even hash-browns. That way your kitchen won’t be so crowded. Enjoy with a nice bloody mary!
You guys. I’m definitely a wine-o, and sometimes going to the same store to get wine just gets old. I also have this weird thing where I love the subscription box idea. I’ve done other wine boxes, a snack box, workout clothing box, grocery box, and even a coffee box and I just love the simplicity of a monthly delivery of my favorite things! I always want to be as transparent as possible on my little corner of the internet, so I want to be clear that I’m not being compensated by anyone to write this blog post. I just really like this product and want to share the products I love!
Photography by Allyson Regan
So let’s talk about how it works! Click on this link, Bright Cellars, which will direct you to the companies website. From there, you take a flavor profile quiz which is super easy and takes less than 5 minutes. Your personal wine concierge then creates your box which contains 4 wines. If you’ve tried other wine boxes like this one, please comment below and let me know if I should try them! One of the reasons I love this box is that the customer service is really great and quick with their responses. My wine concierge emails me minutes after I review my wines and uses that information to create a better box for me the following month. Pictured above is the first box I received, and I loved 2 out of the four wines! The other two wines were still good, and while it was really fun to try these new wines, I learned that I wouldn’t want to buy them again.
One of the wines in particular stood out to me and I will definitely be ordering another bottle. It is the 2017 Zweigelt from Herz & Heim Vineyards. This grape varietal is from Austria, and this particular vintage has notes of warm baking spices, dark berry flavors, and medium bodied. I enjoyed this wine with a really great grilled steak and late summer vegetables, which paired really nicely. It’s currently sold out, but I hope it comes back soon!
So if you’d like to give this a try, click the link here, and you’ll receive two free bottles on your first box! This is a $30 credit, which is like getting 4 bottles of wine for $30. The only thing that is a bit of a hassle with this box, is that you need to have someone with a valid ID over 21 to sign for the box upon delivery. If I know that I won’t be home to receive the box, I usually just call FedEx after it has shipped and ask them to hold it at my nearest Walgreens which I can then pick up at anytime!
Once I open up the bottles from my second box I just received, I’ll post again about my favorites! Feel free to leave a comment about your experiences with wine boxes like this or any other great subscription box.
It seems as though fall can’t quite make up it’s mind quite yet here in Michigan. We had a delightfully chilly week last week, and this week is like the muggiest heat all summer! But nevertheless, butternut squash persists, and has hit the grocery stores. This is one of my all time favorite new recipes!
Photography by Allyson Regan
If you know me well, you know that second only to pasta, risotto is one of my very favorite meals to make. I fall in love with the process every single time. The attention to detail, taking the time to toast the rice, the constant stirring, the careful eye watching for the perfect moment to serve, it’s glorious! When I was about to turn 21, I was the most excited to be able to finally buy wine to make a proper risotto.
Photography by Allyson Regan
Chipotle & Butternut Squash Risotto
1 large butternut squash
1 small can of chipotle peppers, in adobo
olive oil
1 cup arborio rice
3 cups of stock, I prefer chicken
2 tbsp butter
1 small yellow onion, small diced
1 clove of garlic, minced
1/2 cup good white wine
Goat cheese, optional
salt and pepper
Begin by preheating your oven to 350 degrees. Peel and cut the squash into a small dice. Puree the chipotle peppers with the sauce in the can until smooth. Toss the squash with 2 tbsp (less if you don’t like a lot of spice) and a drizzle of olive oil. Bake for about 20 minutes, or until soft. Once cooled, puree 2/3 of the squash.
To start the risotto, begin by melting the butter in a heavy bottomed pot. Slowly caramelize the onion and garlic, over medium low heat. Raise the heat to medium, and add the rice, tossing it to cover well with the butter. Cook until the rice begins to take on color and smell toasted. Deglaze the pan with the white wine, taking care to scrap the delicious brown bits from the bottom of the pan. This kicks off the stirring marathon. Stir evenly, and once the wine has been absorbed, add in 1/3 cup of warmed stock. Continue to repeat stirring and adding the stock. The ratio of 1 cup of arborio rice to 3 cups of stock is tried and true in my kitchen, however, if you end up stirring unevenly or cooking on too high of a temperature, you may need more stock. When you are about to add the last bit of stock, add in the squash puree from earlier. Once the stock has been absorbed, add in the goat cheese. If you are holding this warm for a bit, add in another 2 tbsp of butter which will help the risotto to keep from globbing together. Yes, in addition to making risotto, we are also making up words. Finally, taste and season to your liking. Top each bowl with the roasted squash and more cheese. Enjoy!
Photography by Allyson Regan
Just a note, you probably won’t use that whole can of chipotle peppers, but save them in your fridge. I love to add this puree to my chili to deepen the flavor, or you can toss mushrooms with this puree, oil, and brown sugar and roast to create a very umami-esque taste.
Let’s be honest with each other and get this out into the open. Food is the perfect companion to football and beer. Sundays like today are begging for a cold one and some delicious food. Don’t get me wrong, I love watching football with my guy, cheering on our team. But I love having lots of food options for us during the weekends when there’s so many different games to watch.
Photography by Allyson Regan
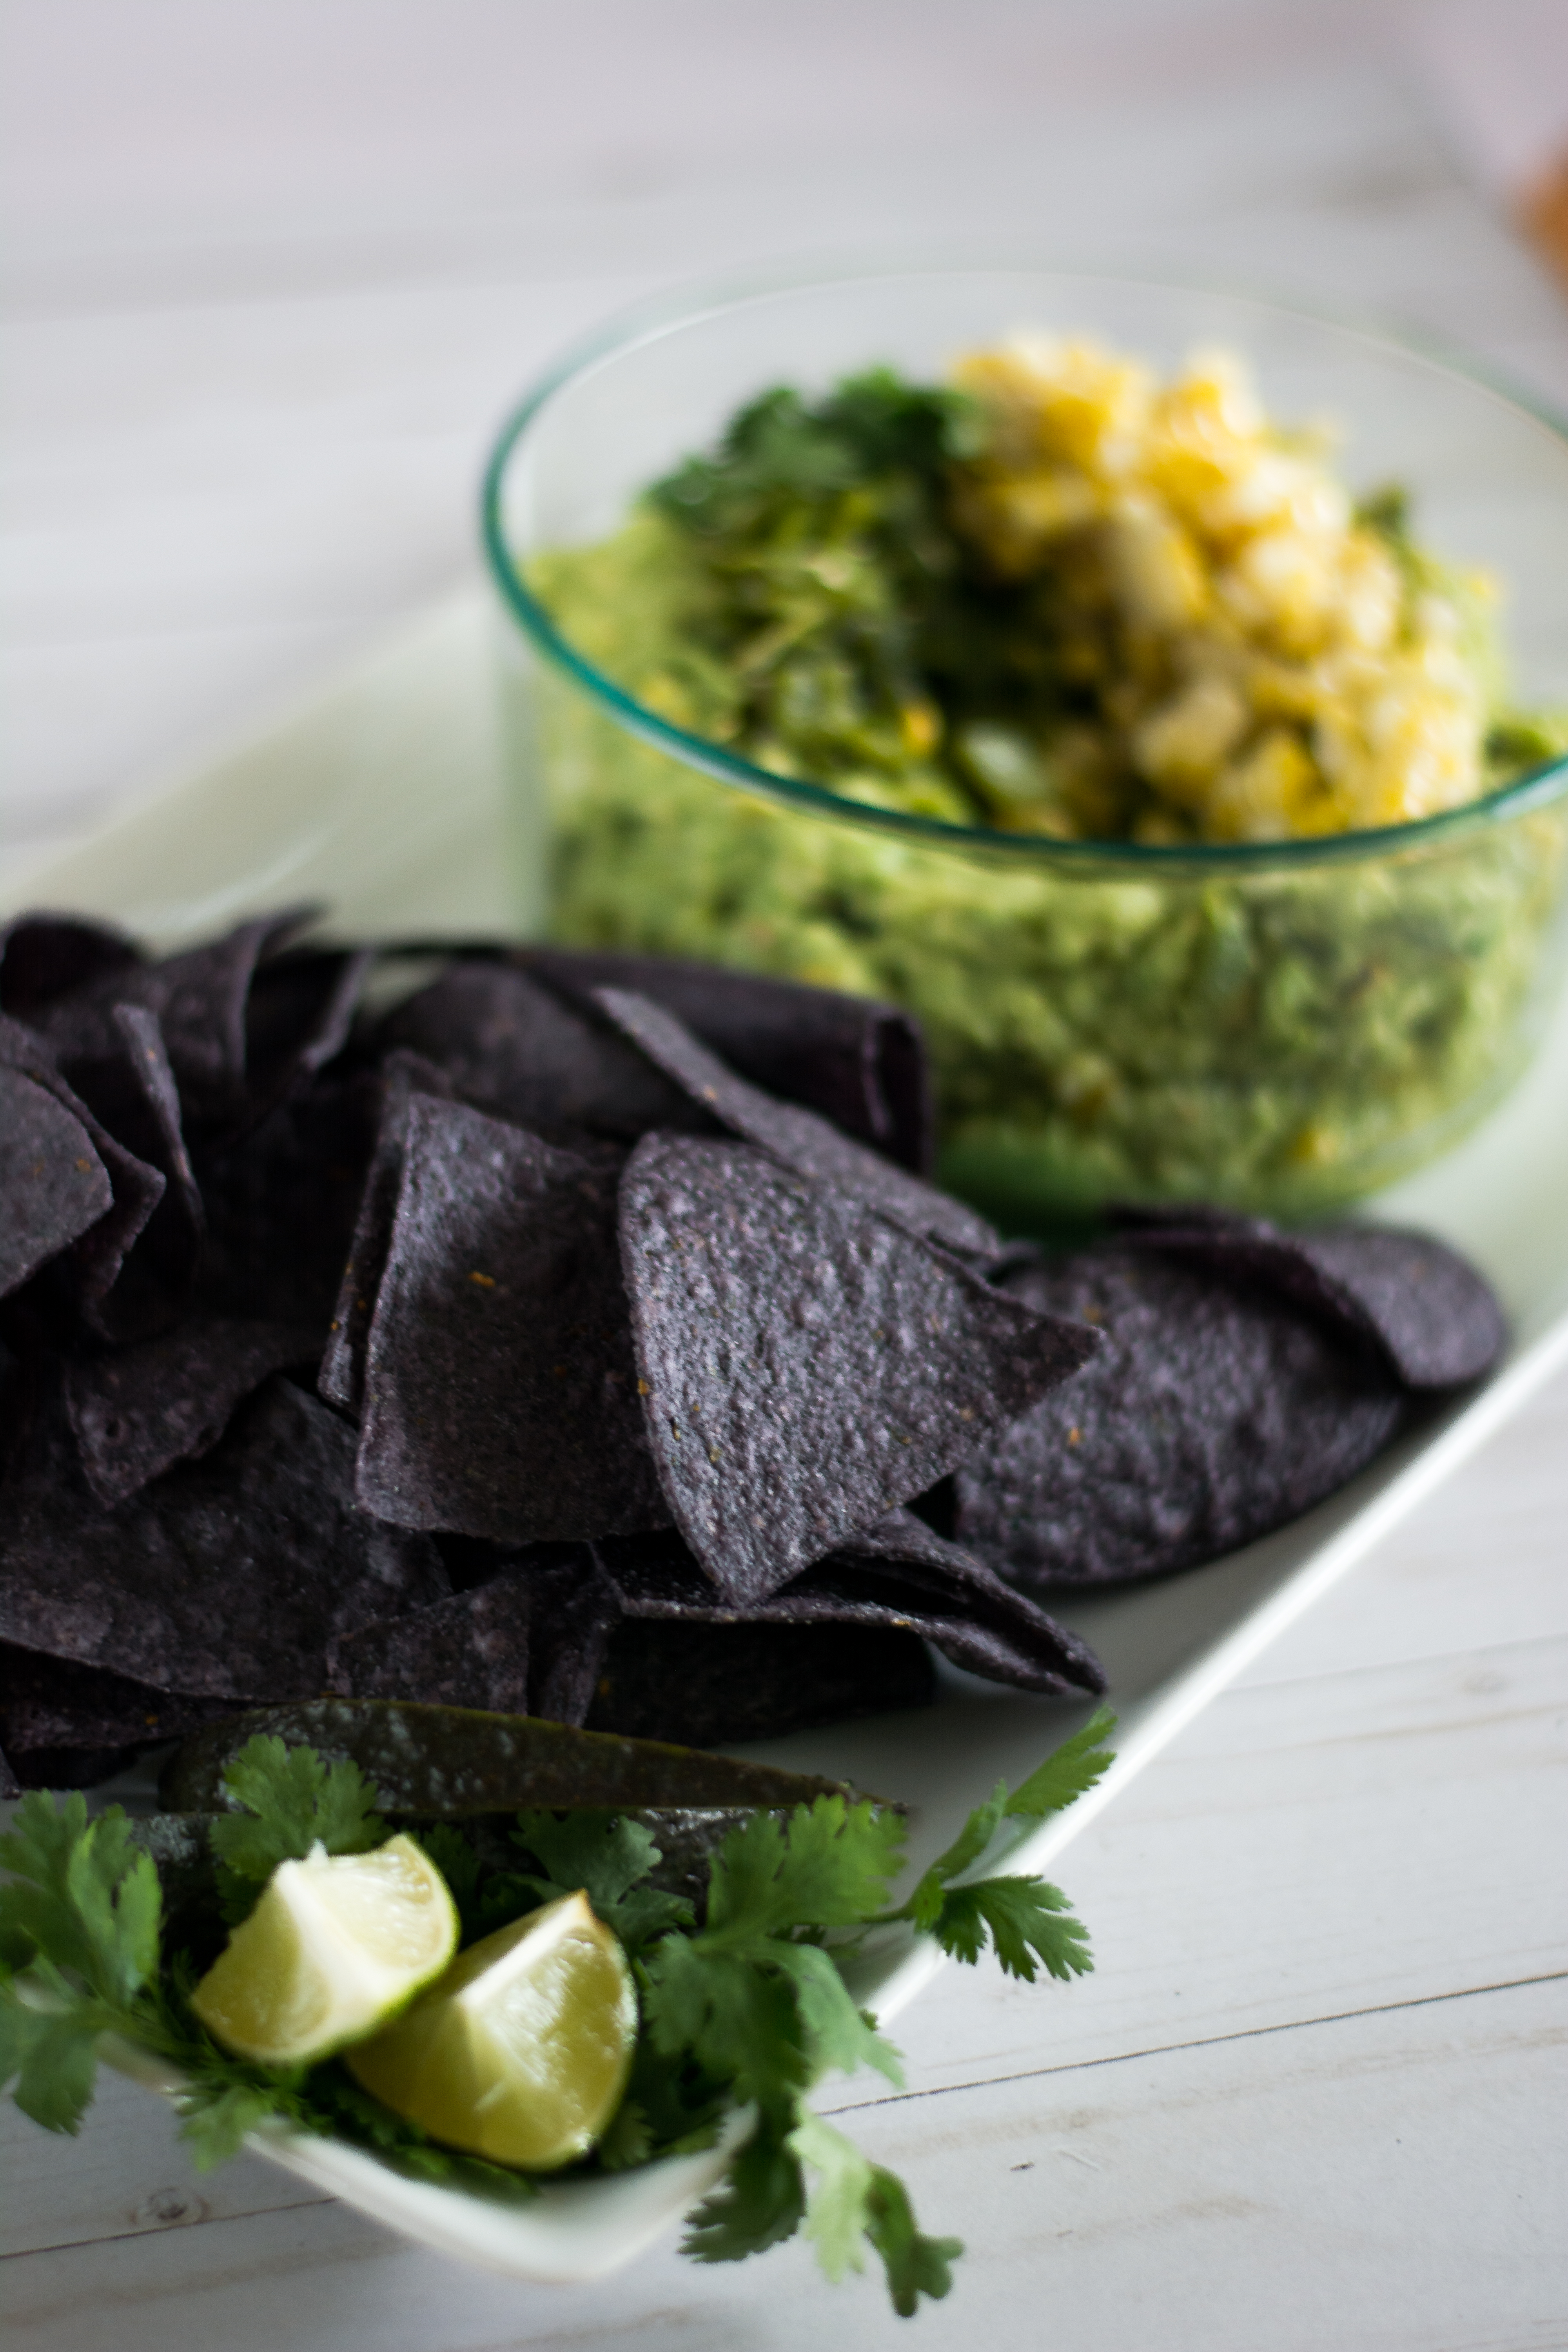
This is just a dressed up version of guacamole, and it almost doesn’t even need a recipe! But I’ll give you one as a reference. Poblanos can be a bit tricky, much like jalapeños. You can never be certain how spicy they be until you eat it. This is why it’s so important to taste as you go. I roasted my poblanos on our grill, because we have an induction range, but if you have a gas stove, you can roast them over the flames.
Photography by Allyson Regan
Roasted Poblano and Corn Guacamole
4 soft avocados
2-3 poblanos
2 limes
1 cup sweet corn
handful of fresh cilantro
salt & pepper
Roast the poblanos over an open flame. Place into a bowl and cover with plastic wrap while cooling. The plastic will trap the heat and help the skins to steam making it super easy to peel. Roast the corn over the flame as well, or sauté in a pan over high heat if using frozen or canned corn. Cut the avocados in half and remove the pits. Scoop out avocado and mash with a fork. Once the poblanos are cool, peel and remove the seeds. Cut into a small dice and add to the mashed avocados. Cut the corn off the cob and add to the avocado mixture. Roughly chop cilantro (optional, I know it’s soapy to some). Juice the limes starting with one. Make sure to taste as you go along. If this will be sitting out for a bit, make sure to add a bit more lime juice to keep the color. As always, season well. If you’d like, you can also add a pinch of coriander and cumin to bump up the flavor even more.
Photography by Allyson Regan
Because there’s lots of poblanos and corn, I didn’t add tomatoes to this guacamole like I usually do. You could definitely still add tomatoes and blistered cherry tomatoes would taste so good with the roasted veggies. I love the way blue corn tortilla chips look next to guacamole and they taste great too!
Fall always seems like a chaotic time, even if you don’t have little ones heading to school. With football always on, pumpkins and apples to pick, winterizing to prepare for, it can sometimes be difficult to eat well. This salad is one of my go to meals, especially after eating football food for a weekend. It’s super simple and very easy to make your own. And it looks almost too pretty to eat!
Photography by Allyson Regan
To start, you’ll need kale (I usually buy the pre-cut bagged stuff), tomatoes, crusty bread, avocados, a good hard cheese (I love pecorino or parmesan in this), and your favorite caesar dressing. I’m a huge fan of Marzetti’s Simply Dressed Caesar dressing. It has great flavor and it has no preservatives! And it has anchovies which makes it a true caesar. Make sure to wash the kale really well, lots of dirt likes to hide in the crevices. Cut your bread into bite-size pieces and toast until crunchy. Halve or quarter the tomatoes, depending on the size. Toss the kale with a good amount of dressing. I like to do this first so that the kale has time to soften a bit. Add in the tomatoes, croutons, avocado chunks, and shredded cheese.
Photography by Allyson Regan
This is a great dish because it’s full of fiber and great nutrition while still making you feel full. If you need to make this into more of a meal, its great with chicken, steak, or even bacon bits on top!
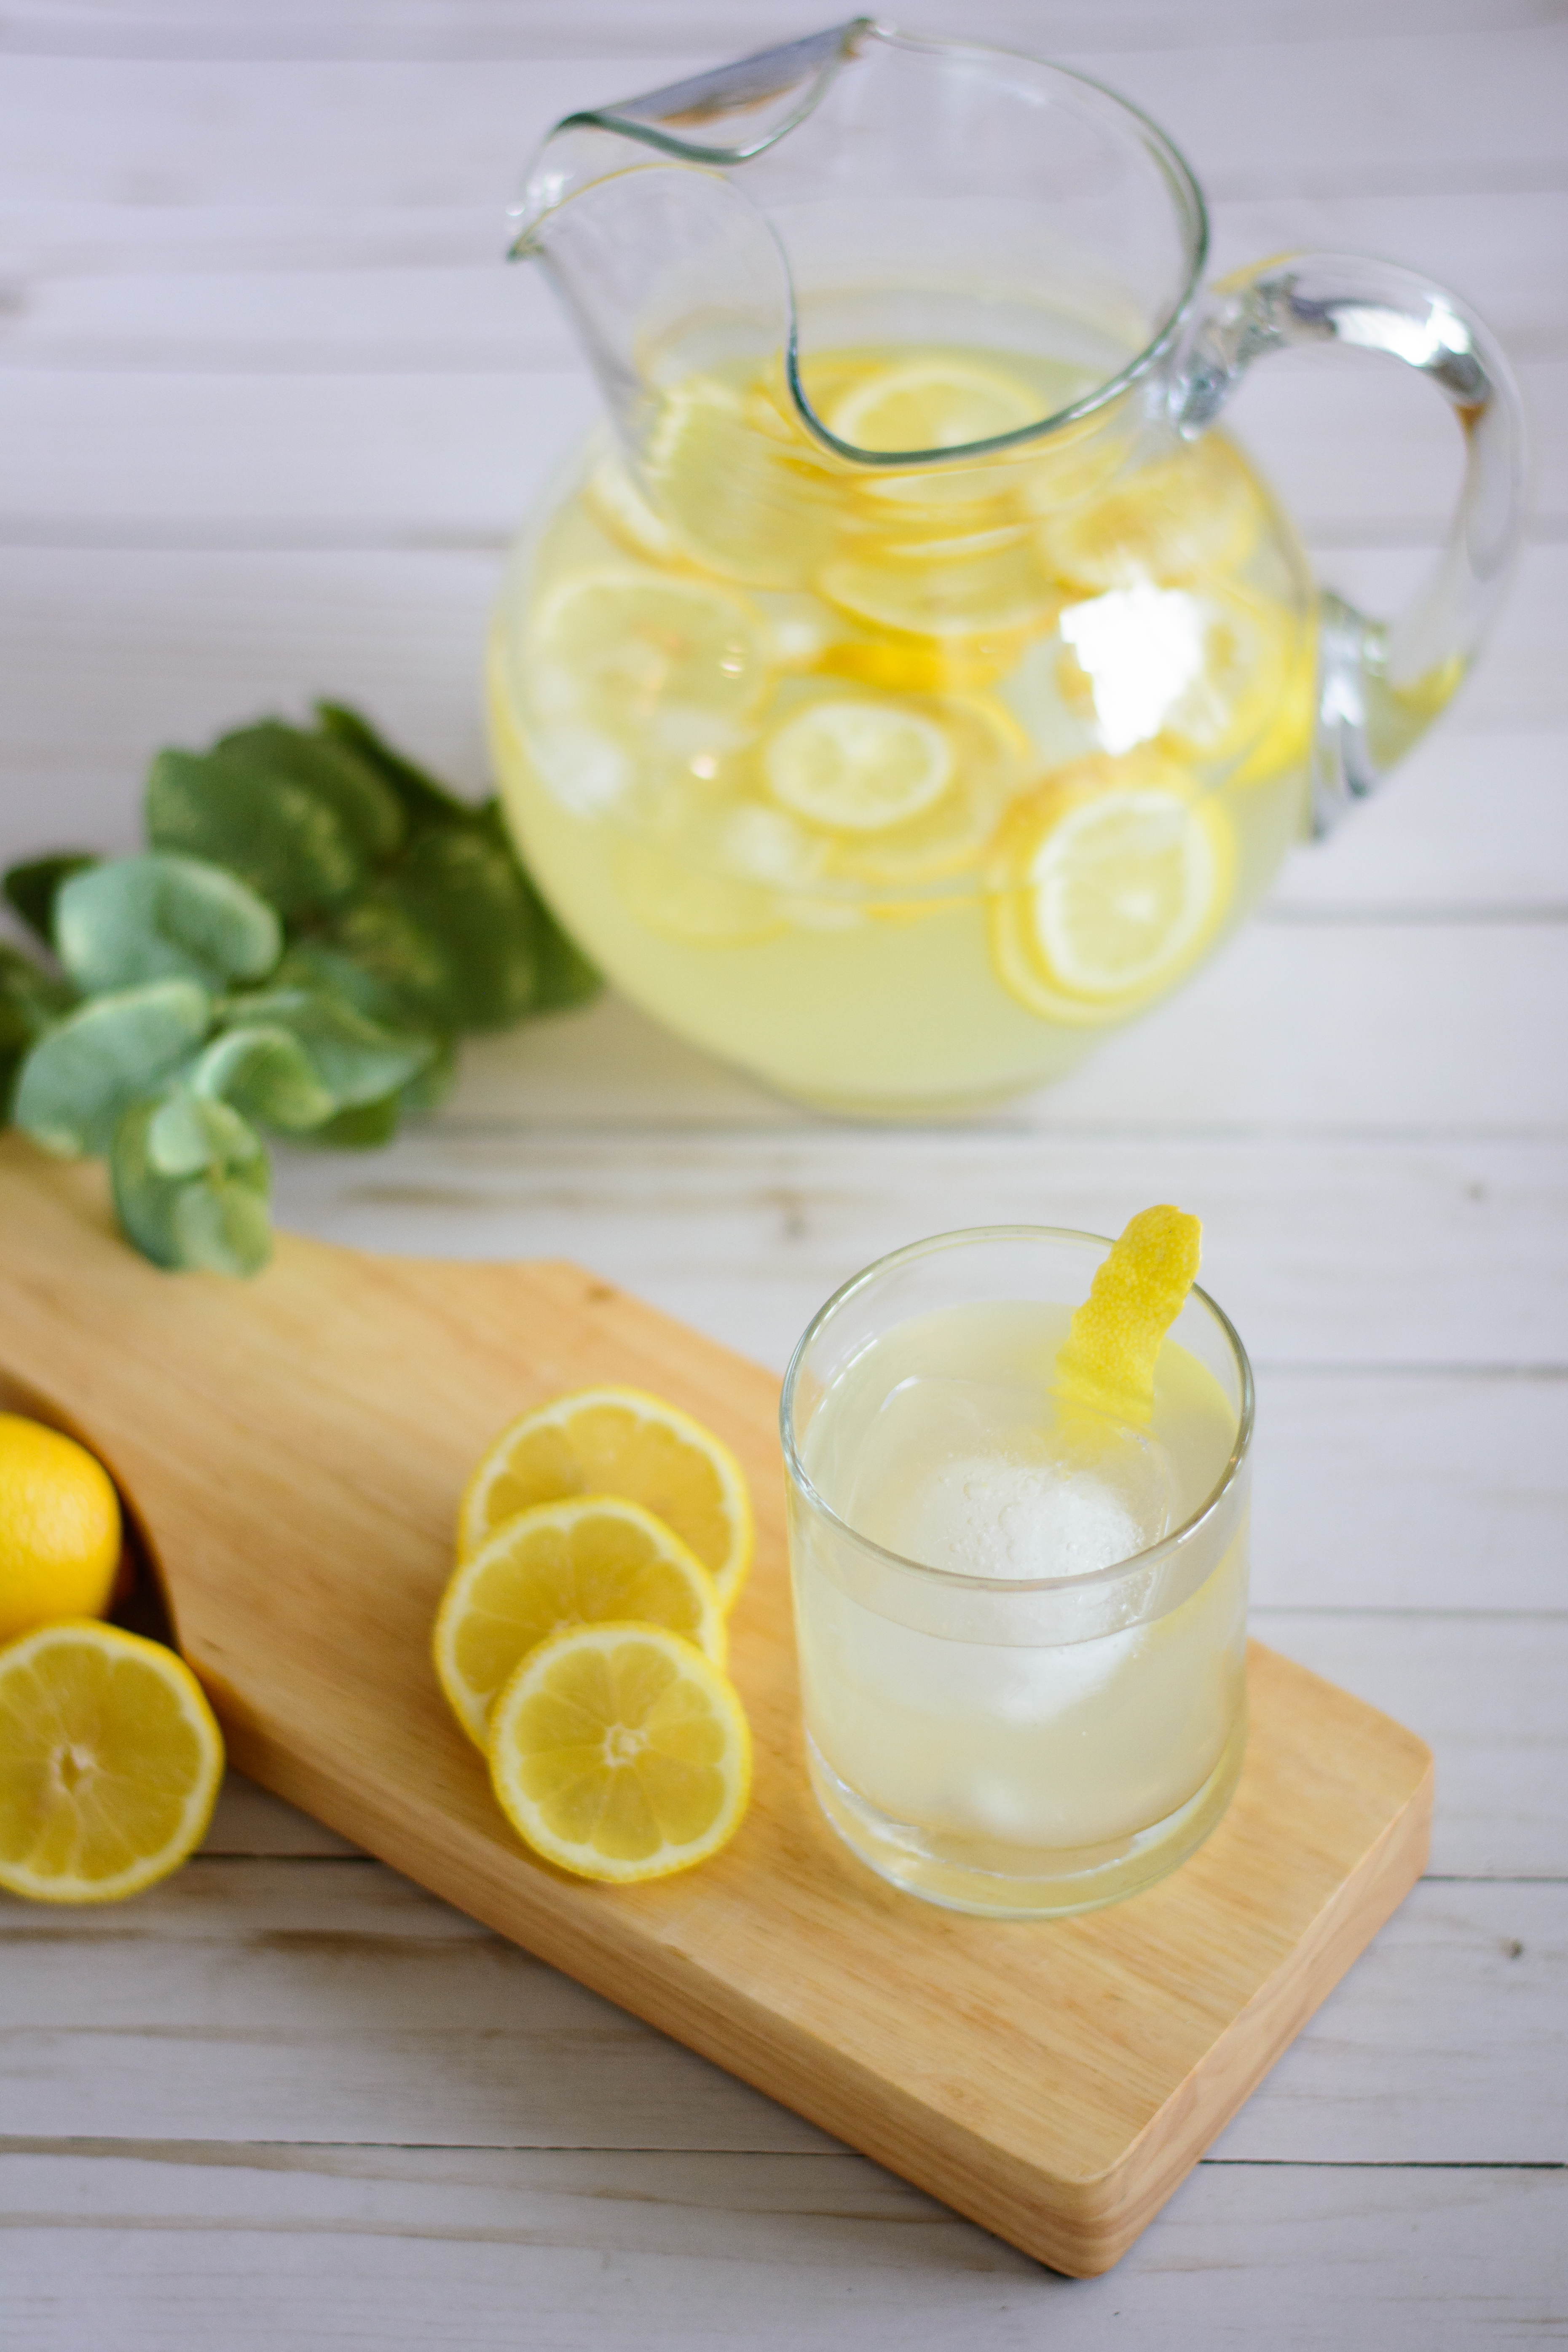
With summer winding down, I’m trying to recap all of my favorite summer recipes. One that I love, especially when it’s hot outside, is fresh lemonade. It’s super simple and is a lot better for you than store-bought. If you want to get into the nitty gritty of what’s really in your lemonade and how terrible it is for you, read it here. It’s disgusting. While I know that you can’t possibly make everything from scratch, this is super simple and easy and you can control the sweetness and flavor.
Photography by Allyson Regan
Making your own lemonade is a great way to control the amount of sugar your family is consuming. You can even change the type of sugar you use. The sweetener in this recipe is known as simple syrup which is also a common ingredient in a lot of mixed drinks. You can purchase simple syrup in any grocery store, but please don’t. You are over-paying for sugar and water, and probably some kind of preservative. Simple syrup is equal parts water and sugar, brought to a simmer over medium heat until the sugar dissolves. You can use granulated sugar or coconut sugar or raw sugar, or what ever you’d like.
Photography by Allyson Regan
Lemonade
6 lemons
1 1/4 cup simple syrup
5 1/2 cups water
Juice the lemons, taking care to strain well. Six lemons should yield around 1 cup of juice. If you use bought lemon juice, you might need more simple syrup. Combine the lemon juice, simple syrup, and water in a large pitcher. This should yield about 7 cups of lemonade, which is quite a bit, but you can mix it with iced tea arnold-style or add vodka happy hour-style. Add plenty of ice and enjoy!
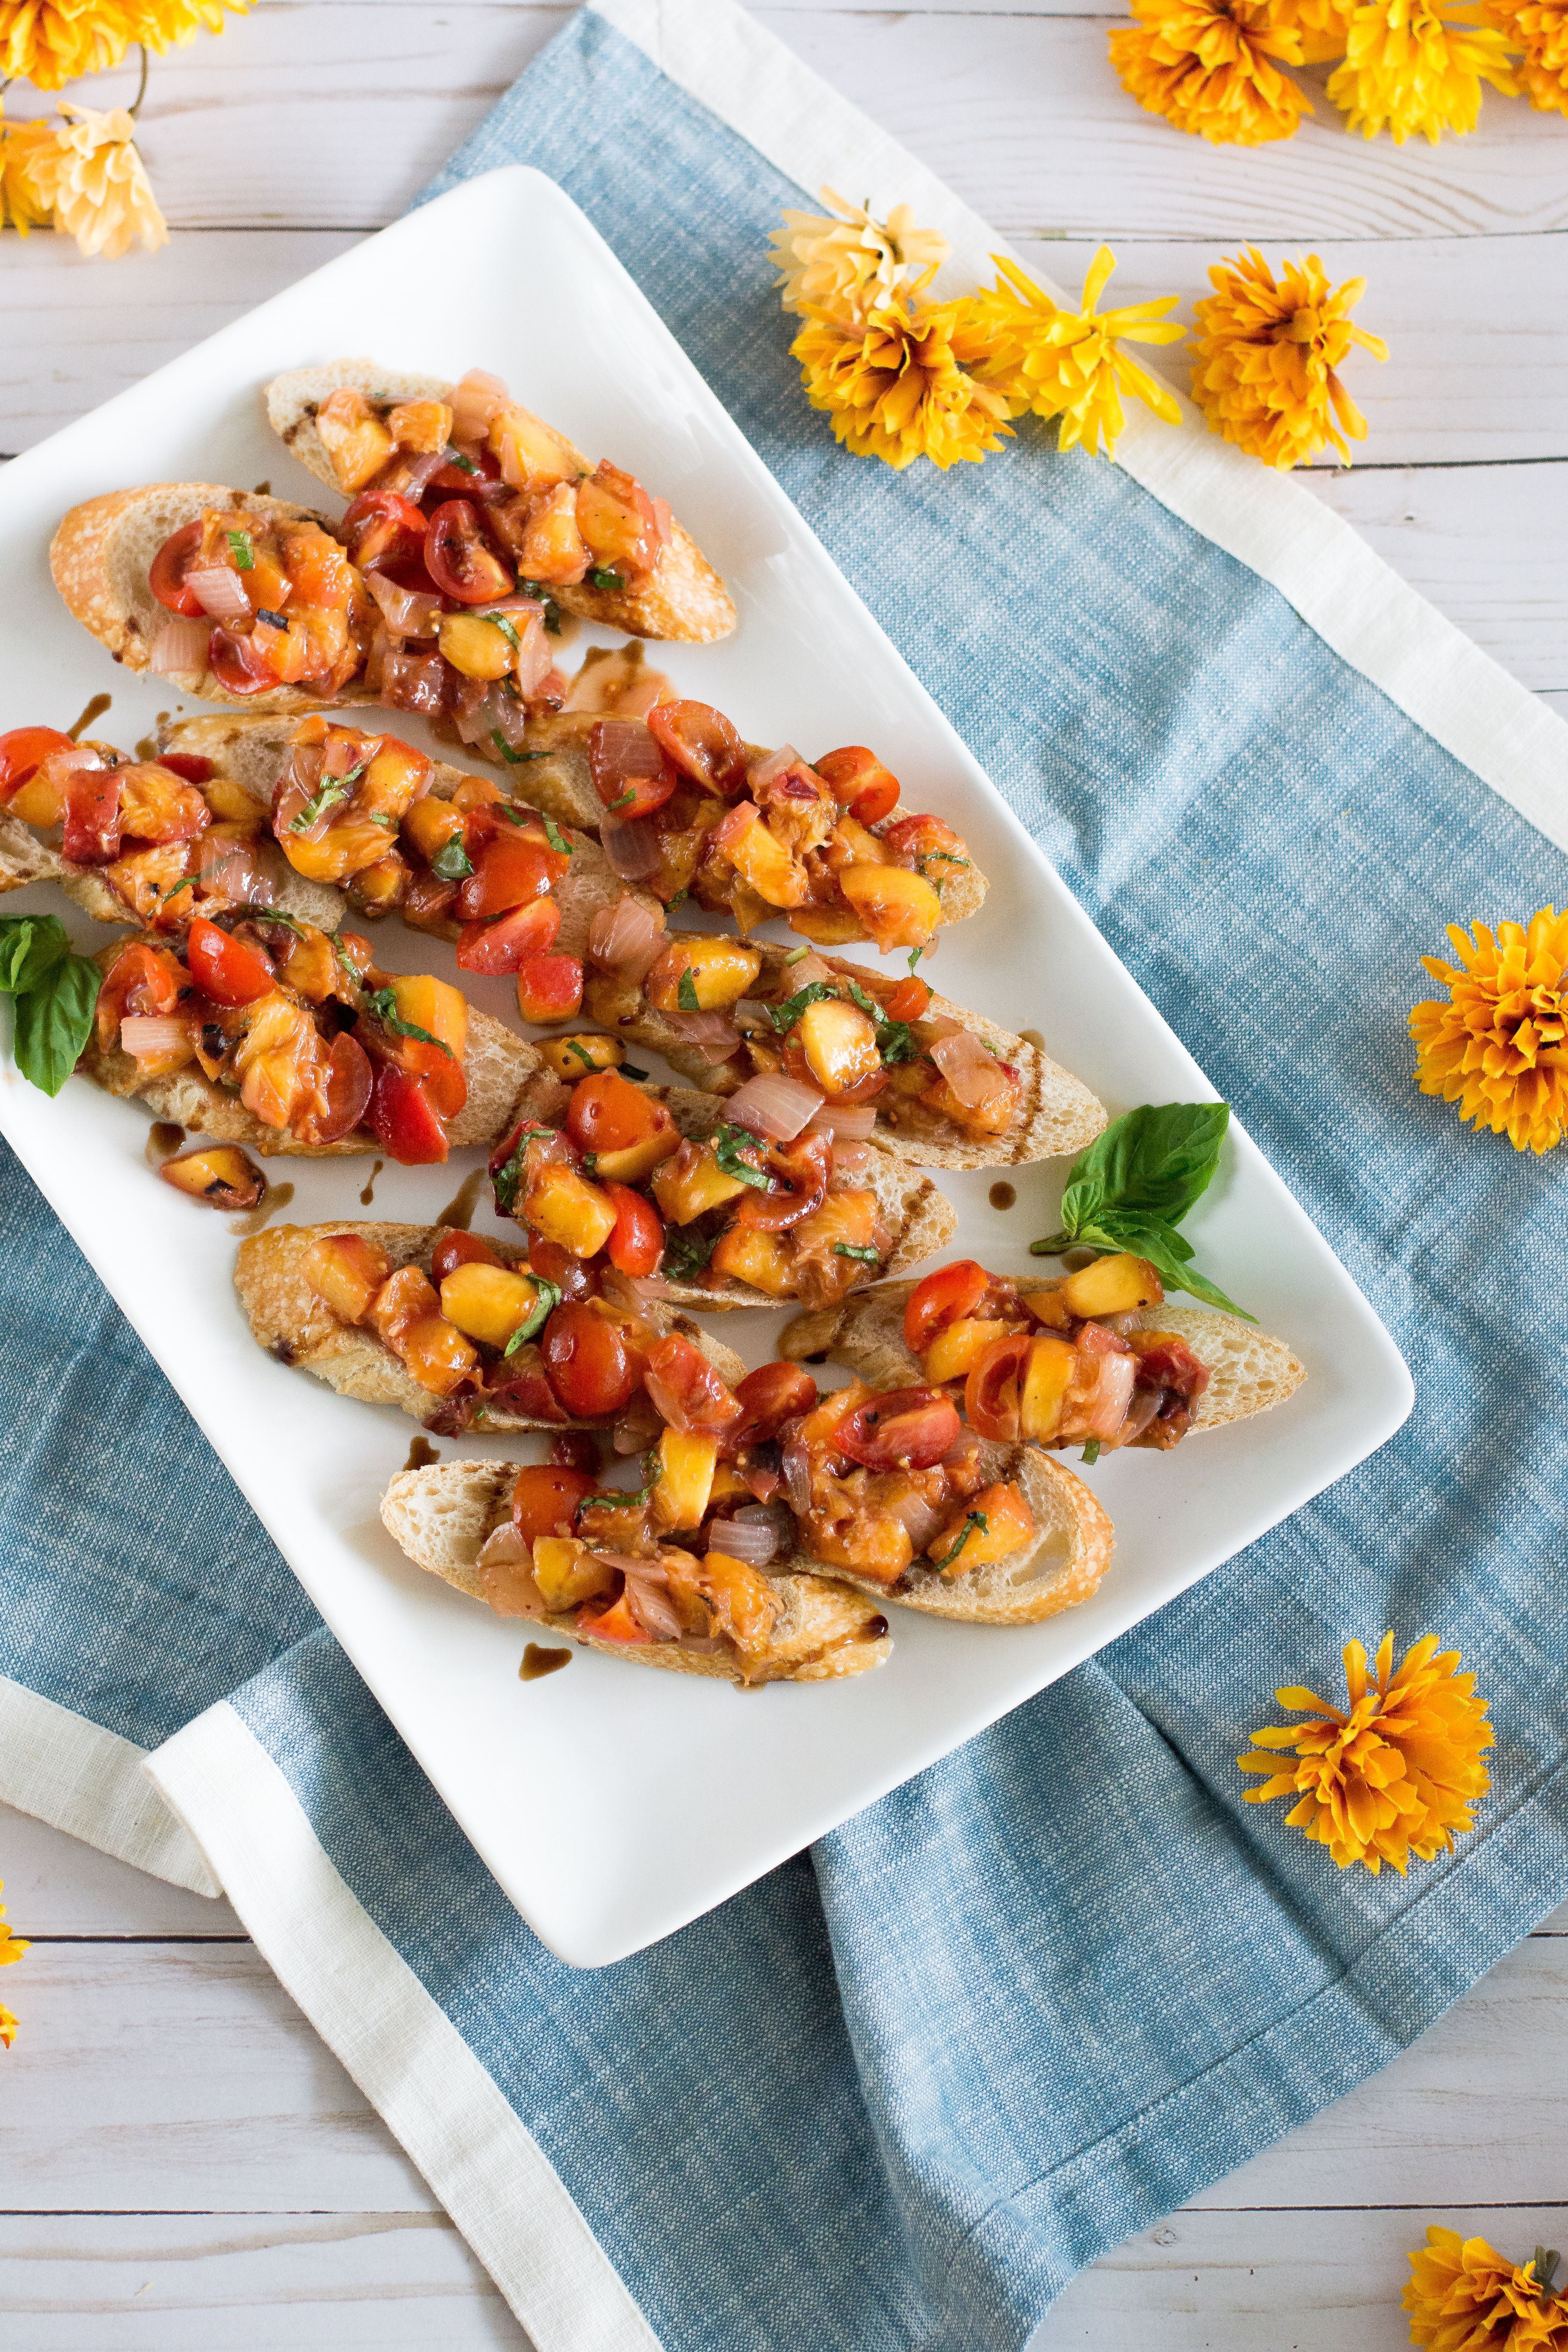
Well folks, nows the time to soak up the last flavors of summertime. Before you know it, kids will be back in school, leaves will be falling, produce will be dwindling at the markets, and peach season will be replaced by apples. So, while your grill is still out, and those peaches are waiting to be used, try out this recipe!
Photography by Allyson Regan
Grilled Peach Bruschetta
1 crusty baguette
6 peaches, halved
1 small yellow onion
1 pint cherry tomatoes, red or yellow
1 tbsp balsamic vinegar
1 clove garlic
2 tbsp olive oil, plus more for brushing
5 leaves fresh basil
salt and pepper
Preheat your grill to medium high heat, aim for 350-400 degrees. Brush the peach halves with olive oil. Thinly slice the baguette with a serrated knife. Dice the yellow onion and sweat in a small pan. Cook until they start to caramelize. Cut the cherry tomatoes in half and mince the garlic. Thinly slice the basil. Combine the tomatoes, garlic, onions, balsamic vinegar, olive oil, basil, and a pinch of salt and pepper. Grill the peaches carefully, starting with the cut side down. Grill the baguette on both sides until crisp. The peaches are ready when they start to get softer and juicy. Removing the skins is optional, then dice the peaches so they are similar in size to the tomatoes. Add the peaches to the rest of the mixture and combine well. Taste and adjust the salt and pepper if needed. Spoon over the baguette slices.
Photography by Allyson Regan
Now, if you have an inordinate amount of peaches, you can avoid the tomatoes all together and go full peach. I also love to use blueberry balsamic vinegar from the Olive Cart. It just adds a nice fruity flavor that compliments the peaches. This dish is a great appetizer to kick off an end of summer get-together.